
Assigning Rates and Rate Sheets to a Customer
1.3 min read
|This article is about the Billing Manager app, not the Billing Wizard in 3PL Warehouse Manager. To learn about the Billing Wizard, please refer to the articles in the Billing Setup.
This article guides you in assigning rates to customers using different methods.
There are two ways to assign rates:
1. Rate list
2. Customer configuration
Assigning rates from the Rate List view
- To assign a rate for a customer from the Rate List view, select the desired rate(s) from your list of rates and click the 'Assign Rate to Customer' icon as shown below.

- Choose between the Global rate or the Custom rate. To understand the difference between these options, refer to our article on Understanding Global Rates vs Custom Rates.

If you selected more than one rate in Step 1, you won't be able to assign it as a custom rate. 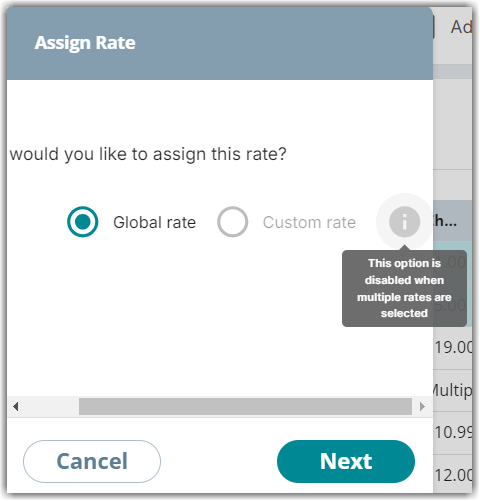
3. Select which customer to assign the selected rate(s) to. Then, click Assign.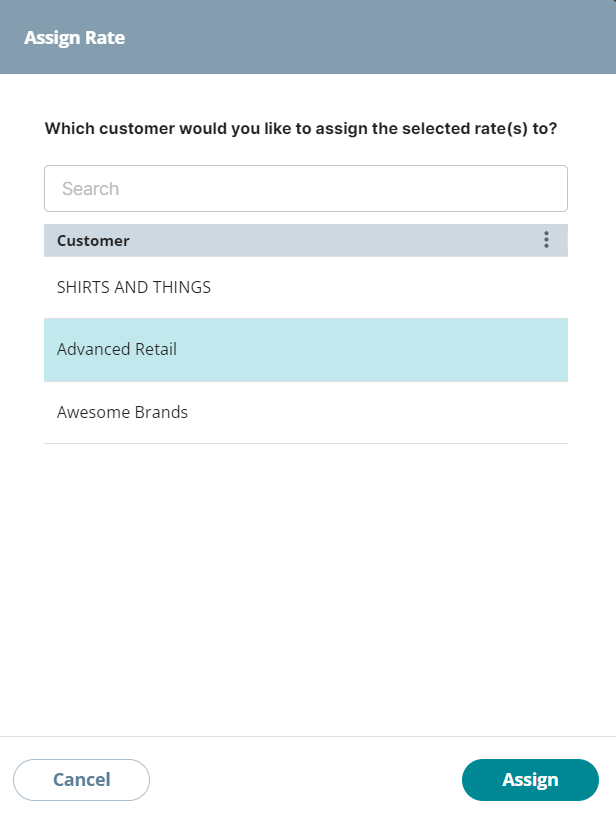
Assigning rate sheets
- To assign a rate sheet, navigate to the Rates module of Billing Manager. Then, click Rate Sheets.
- Select which rate sheet to assign. If you have no existing rate sheet yet, refer to our article on Creating Rate Sheets.
- Click the ‘Assign Rate Sheets to Customer’ icon as shown below.

- Choose between Global Rate Sheet and Singles Rates.
Opting for Single Rates will allocate all rates as individual global rates for the chosen customer, rather than assigning them to a combined rate sheet.
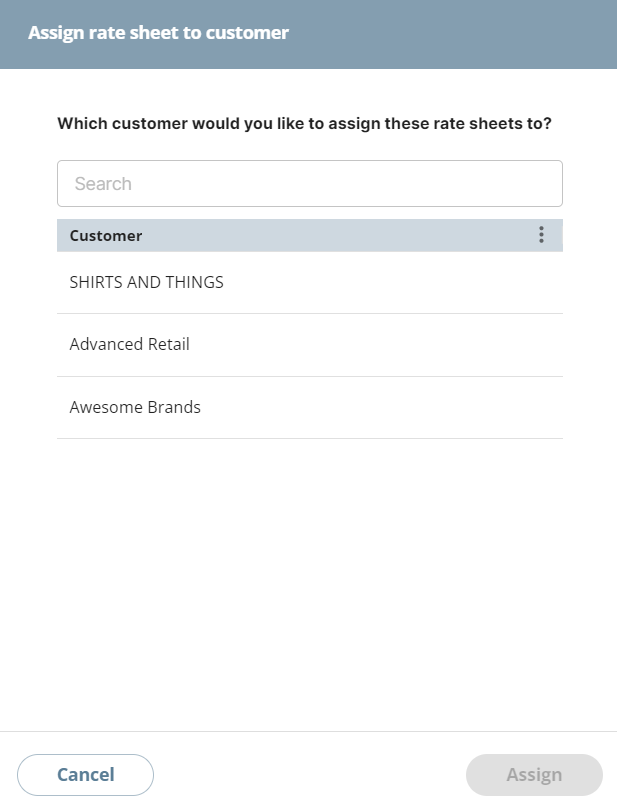
- Select which customer to assign the selected rate(s) to. Then, click Assign.
Customer configuration
Assign rates and rate sheets from Customer's module. 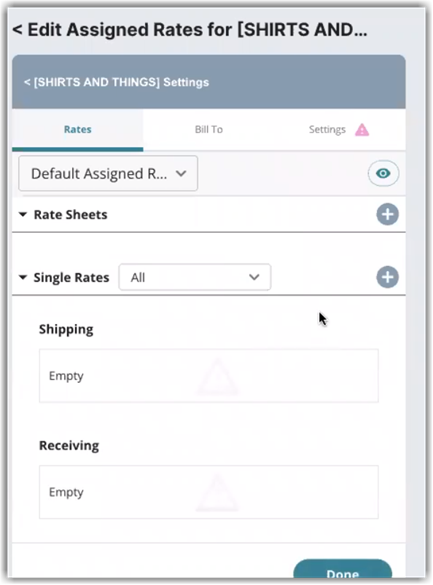
Click the add button next to Rate Sheets or Single Rates based on your preference.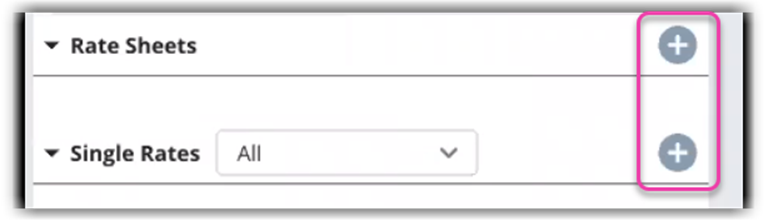
Rate sheets
- Choose the rate sheet you want to assign to the customer.
- Click Choose. You can still add single rates on top of the assigned rate sheet.
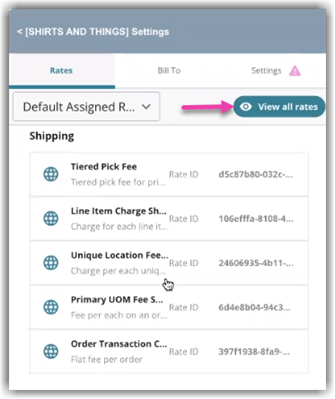
- The selected rate sheet will appear on the Edit Assigned Rate page, as shown below. To view all individual rates included in the rate sheet, click the View all rates icon.
Single rates
- Choose the single rate(s) you want to assign to the customer. You can add as many as you like.
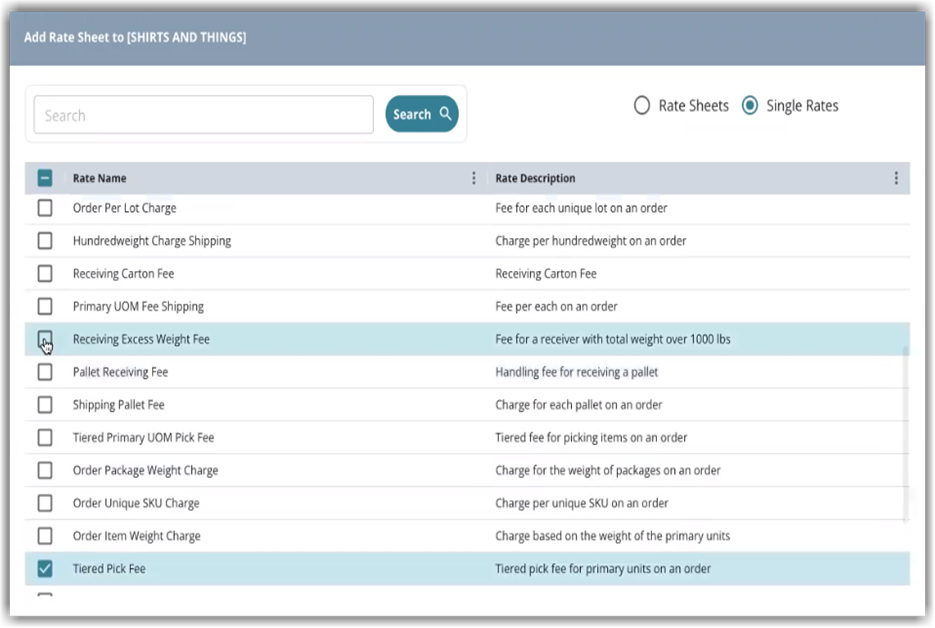
- Click Choose.
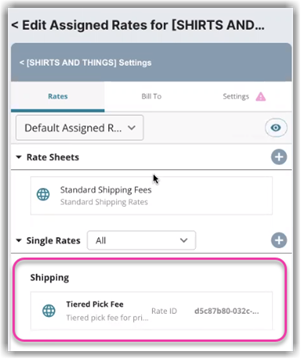
- The selected single rates will now appear on the Edit Assigned Rate page, as shown below.
Was this article helpful?
Share additional feedback about this article