Navigating Network Manager
Network Manager is an Extensiv product, currently in beta, that enables 3PLs to work with other 3PL providers to serve additional customers. It provides visibility of all transactions and inventory across multiple 3PL Warehouse Manager accounts, includes order management and full-powered order routing—powered by Extensiv Order Manager, and allows you to oversee customer activity across your network.
This article reviews how to understand and navigate Extensiv Network Manager.
Here's a list of some of the available features Network Manager provides:
- Inventory and transaction summaries and details across all networked warehouses
- Dedicated warehouse admin and customer visibility portal
- Logic-based order routing tools
- Seamless order flow from cart to WMS and back
- Real-time order processing status across all servicing facilities
- Holistic view of inventory levels across all networked warehouses
- Drill-down of individual warehouse inventory levels
- Ability to set warehouse inventory minimums
If you're interested in accessing Network Manager, please contact your Customer Success Manager (CSM) to get started.
Guidelines
To access Network Manager, follow the login instructions in your invitation email. Once you're logged in, select Network Manager. You can then access each Network Manager page through the welcome message options or the side navigation menu.
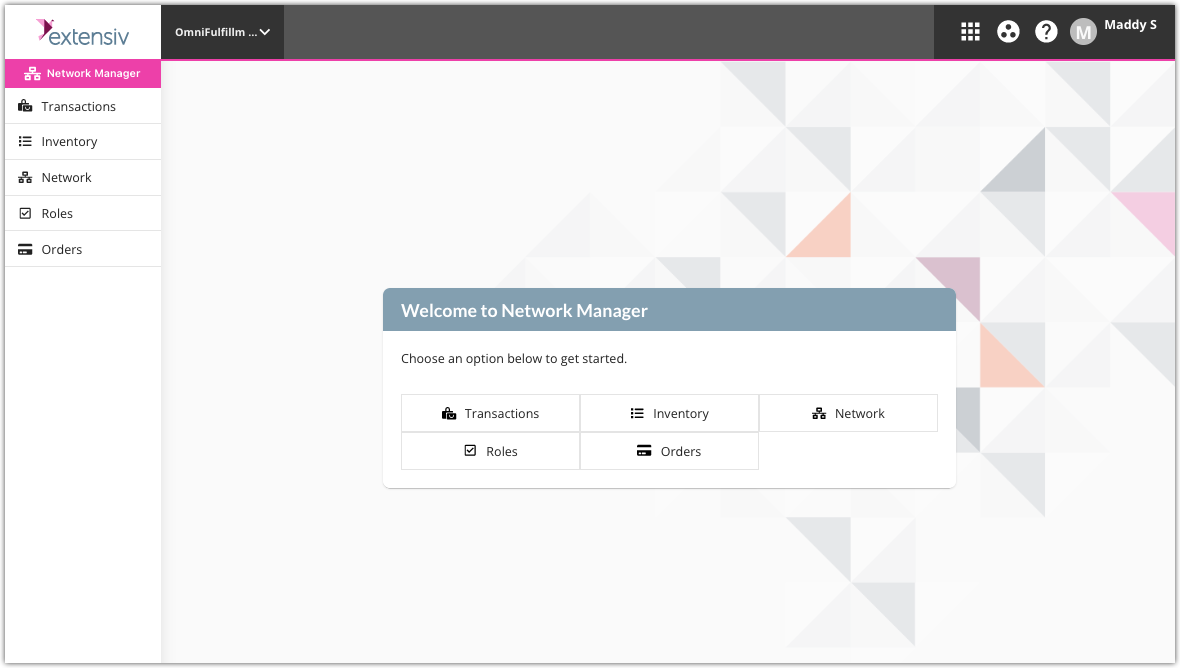
Each of these pages are reviewed in detail below.
Transactions
The Transactions page allows you to view transaction details for orders, receipts, adjustments, and assemblies across all warehouses within your network. This data is pulled directly from Extensiv 3PL Warehouse Manager.
Network Manager can load up to 4,000 transactions at once. If more than 4,000 transactions attempt to load upon opening the page, you are asked to refine your search criteria to narrow down the results.
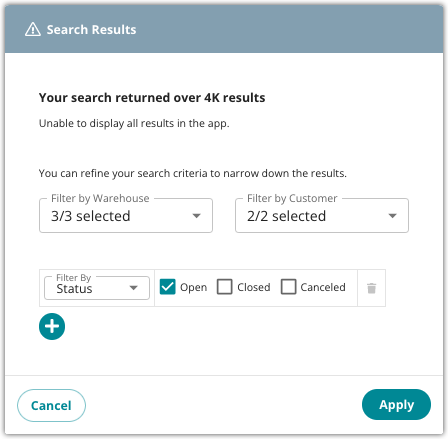
There are two sets of filters available on this page:

- The top filters apply to all transaction types, which includes transaction ID or reference number, warehouse, and customer.
Note:
The "Customer" filter does not appear for customer users viewing this page.
- The filters directly above the grid are specific to the transaction type you're looking at—these filters include status, process date, creation date, SKU, and ship-to information.
Orders that are in a "Complete" status in 3PL Warehouse Manager currently display as "Closed" in Network Manager.
Here are a few tips on using the search filters:
- Use the "Filter By" field to select your search criteria, select the available options, then click Search.
- If you want to apply multiple filters, select the Add button to apply additional search criteria. Once you apply all desired filters, click Search.
- Select Save Filters above the grid to save the applied filters the next time you look at that transaction type.
Note:
These saved filters do not currently apply to future login sessions.
You can also move and sort the grid columns as needed.
Note:
Currently, these grid changes do not apply the next time you load the page.
Inventory
The Inventory page allows you to see all inventory across your network, including the quantity of items on hand, available, and currently allocated. This data is pulled directly from Extensiv Order Manager.
The initial Items grid displays a summary view of these items and allows you to filter by SKU, warehouse, and customer.
Note:
The "Customer" filter does not appear for customer users viewing this page.
When you have "All Warehouses" selected, the Items grid displays all products across each of the warehouses within your network.
- If you select an item from the grid, you can see a breakdown of the inventory quantities across the warehouses in your network.
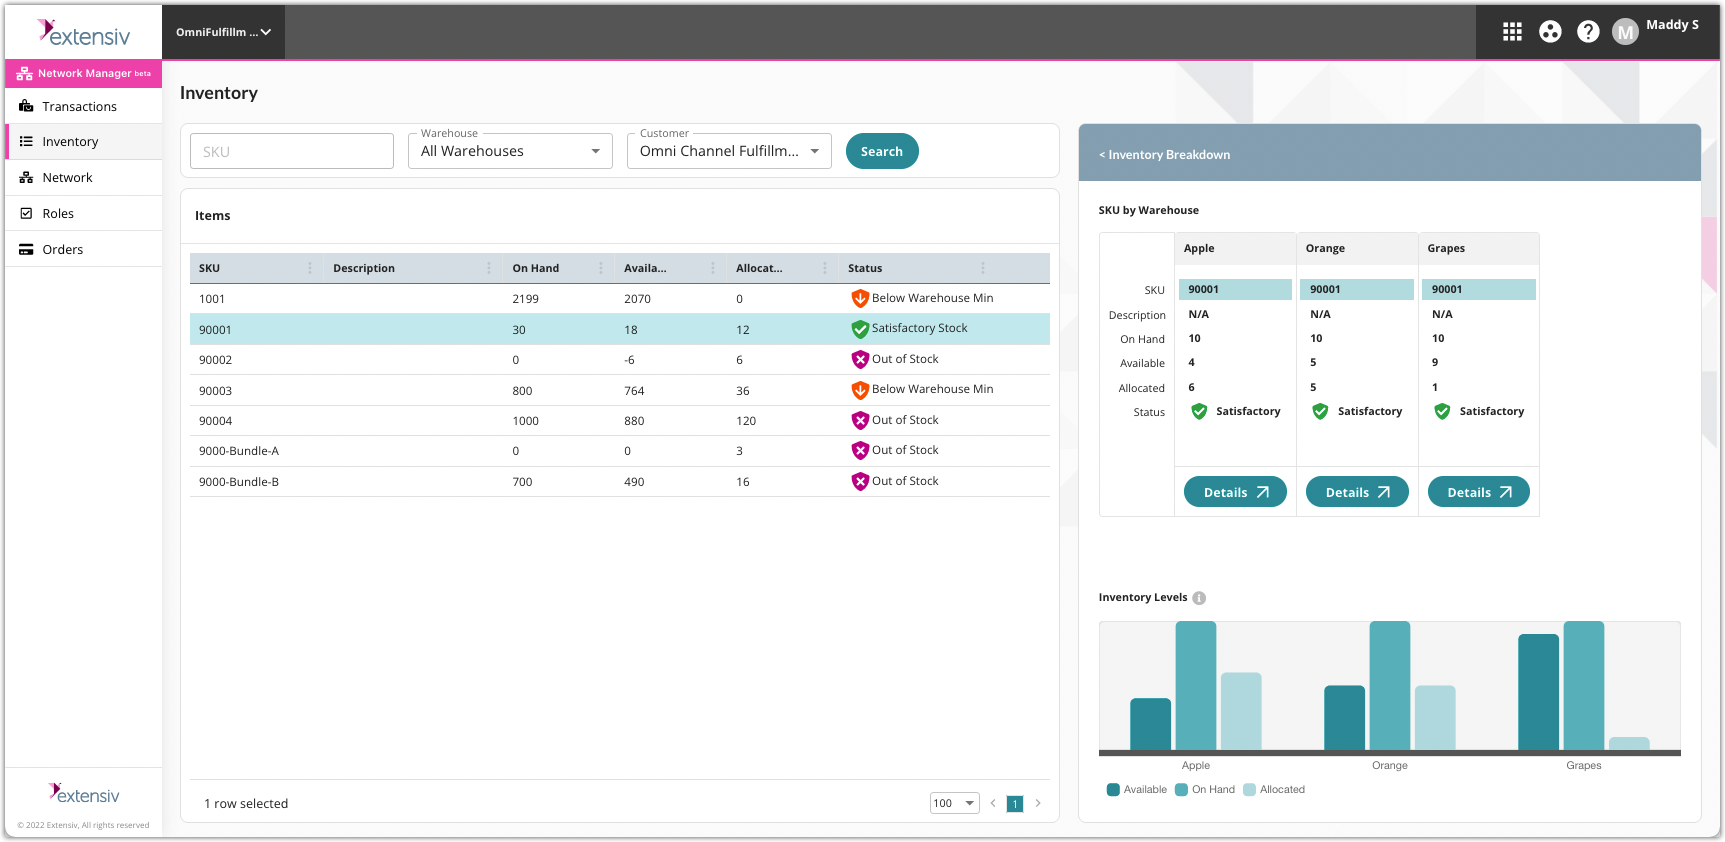
- If you select Details, you are directed to the Warehouse Details grid that shows the specific inventory line items in the warehouse.
Roles
The Roles page allows the admin user to create specific user roles and assign these roles to other Network Manager users.
To invite additional users to Network Manager, please contact your Extensiv representative.
- To create a new role, click Create, enter an appropriate role name and description, then click Save. Once created, click Edit to assign the role permissions. Select each permission you'd like to assign this role, then click Save to finalize.
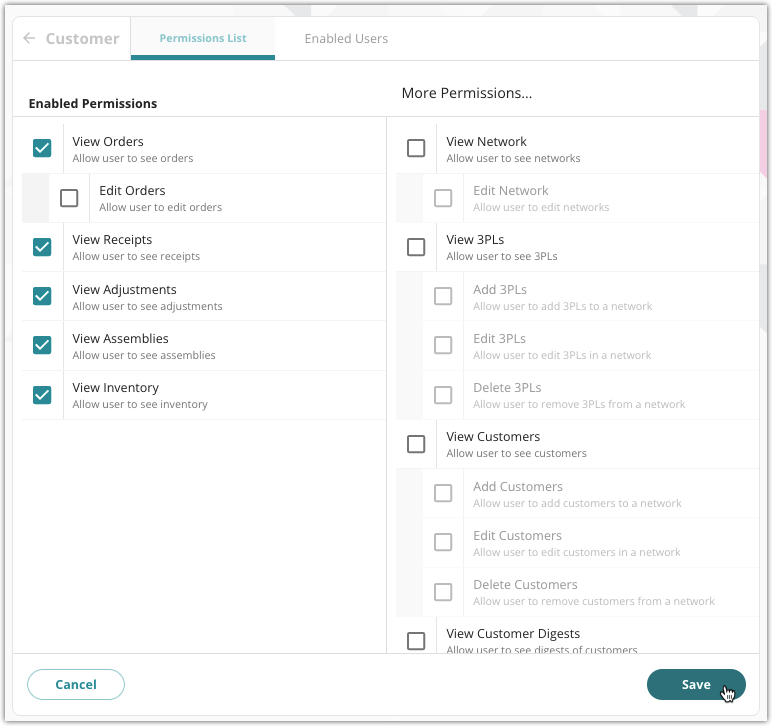
- To assign users to this role, select the Enabled Users tab, click Edit, select each user, then click Save.
- To edit permissions for an existing role or assign users to an existing role, simply select the role from the grid and click Edit. Make your changes, then click Save.
Orders
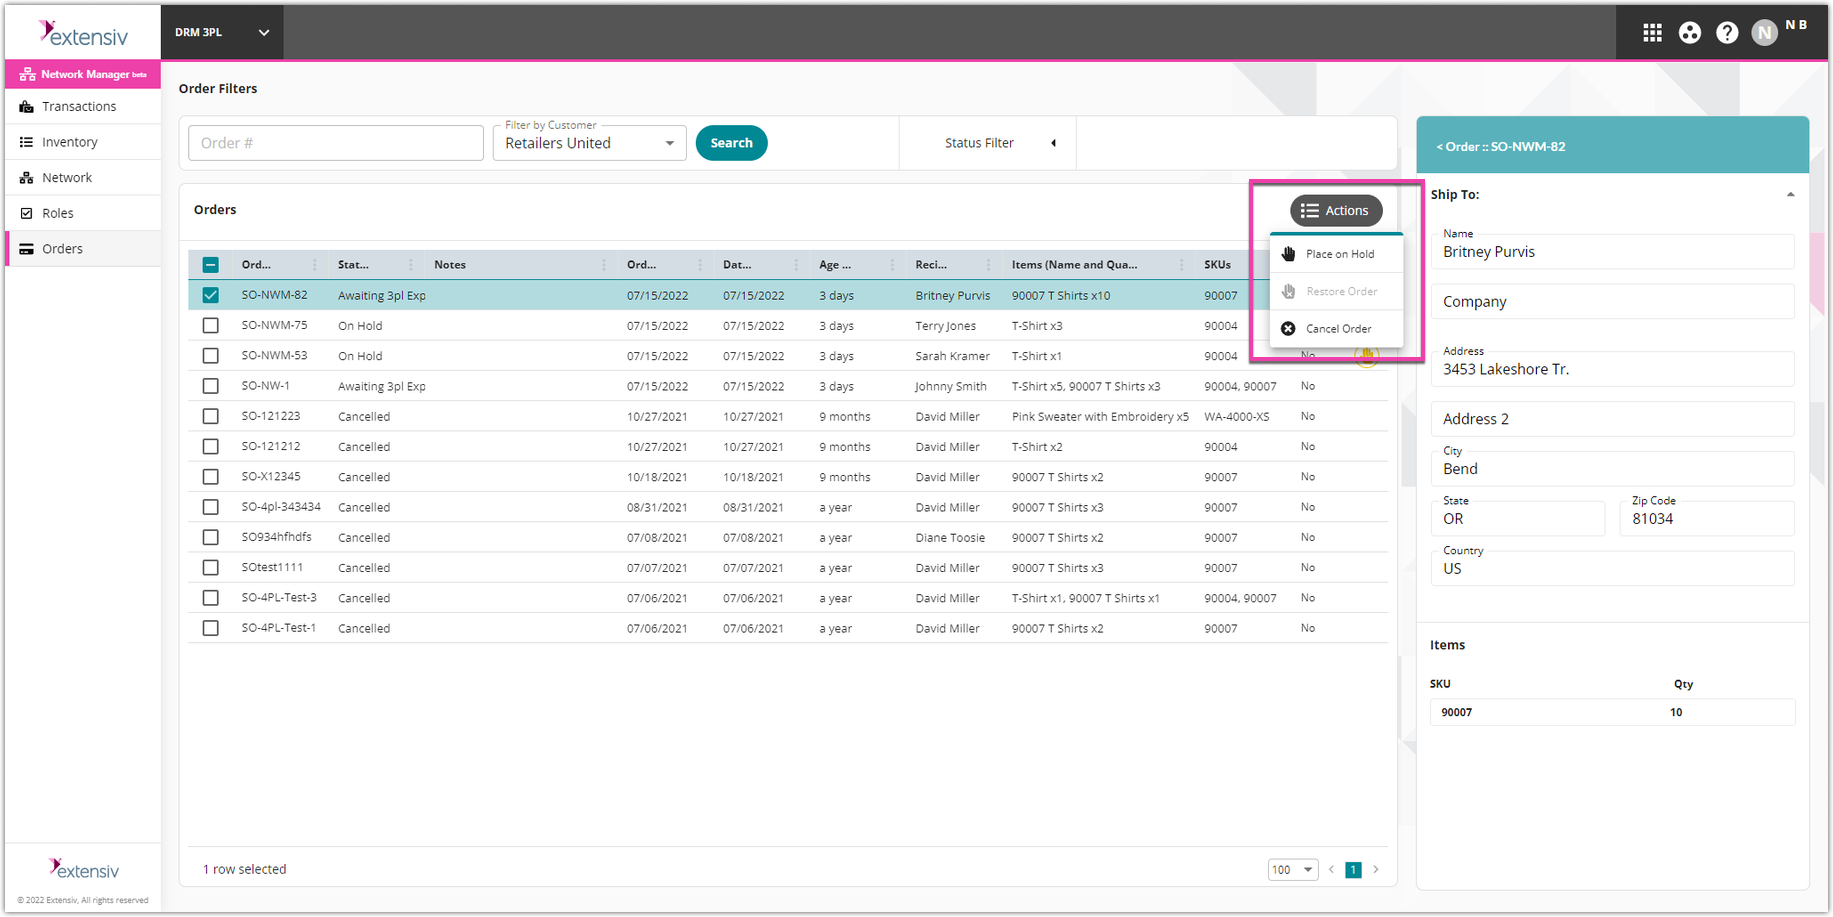
The Orders page displays all unresolved orders that have not been sent to 3PL Warehouse Manager. This could be due to items that are out of stock or for other reasons that caused the orders to not be routed to a specific warehouse.
You can filter the grid by order number, customer, and status.
Note:
The "Customer" filter does not appear for customer users viewing this page.
On this page, you can cancel orders and place items on and off hold by selecting a line item from the grid and choosing an option from the Actions menu above the grid.
