Pallet In/Pallet Out Workflow
Overview
What is pallet in/pallet out?
A pallet in/pallet out workflow describes the process in which a pallet comes into a warehouse as its own unit and gets shipped out as that same unit. There is no breakdown of quantities, the primary unit of measure (UOM) is the pallet itself, and it does not get reconfigured while in the warehouse.
When would I use it?
A pallet in/pallet out workflow works best when you receive inventory that is not going to get broken down, such as a pallet of cement mix or a super sack of coffee beans.
This workflow is especially helpful for any warehouses receiving/shipping through LTL or full truck load consolidation, anyone cross-docking, or warehouses who care more about the physical pallet coming in/out rather than the commodity being inventoried.
What is the process?
There are several configurations that need to take place in and out of 3PL Warehouse Manager before you can successfully implement this pallet in/pallet out workflow.
Please make sure the following have been completed before proceeding:
- SmartScan is enabled
- SmartParcel is enabled and configured
- Zebra Browser Print is installed and fully configured
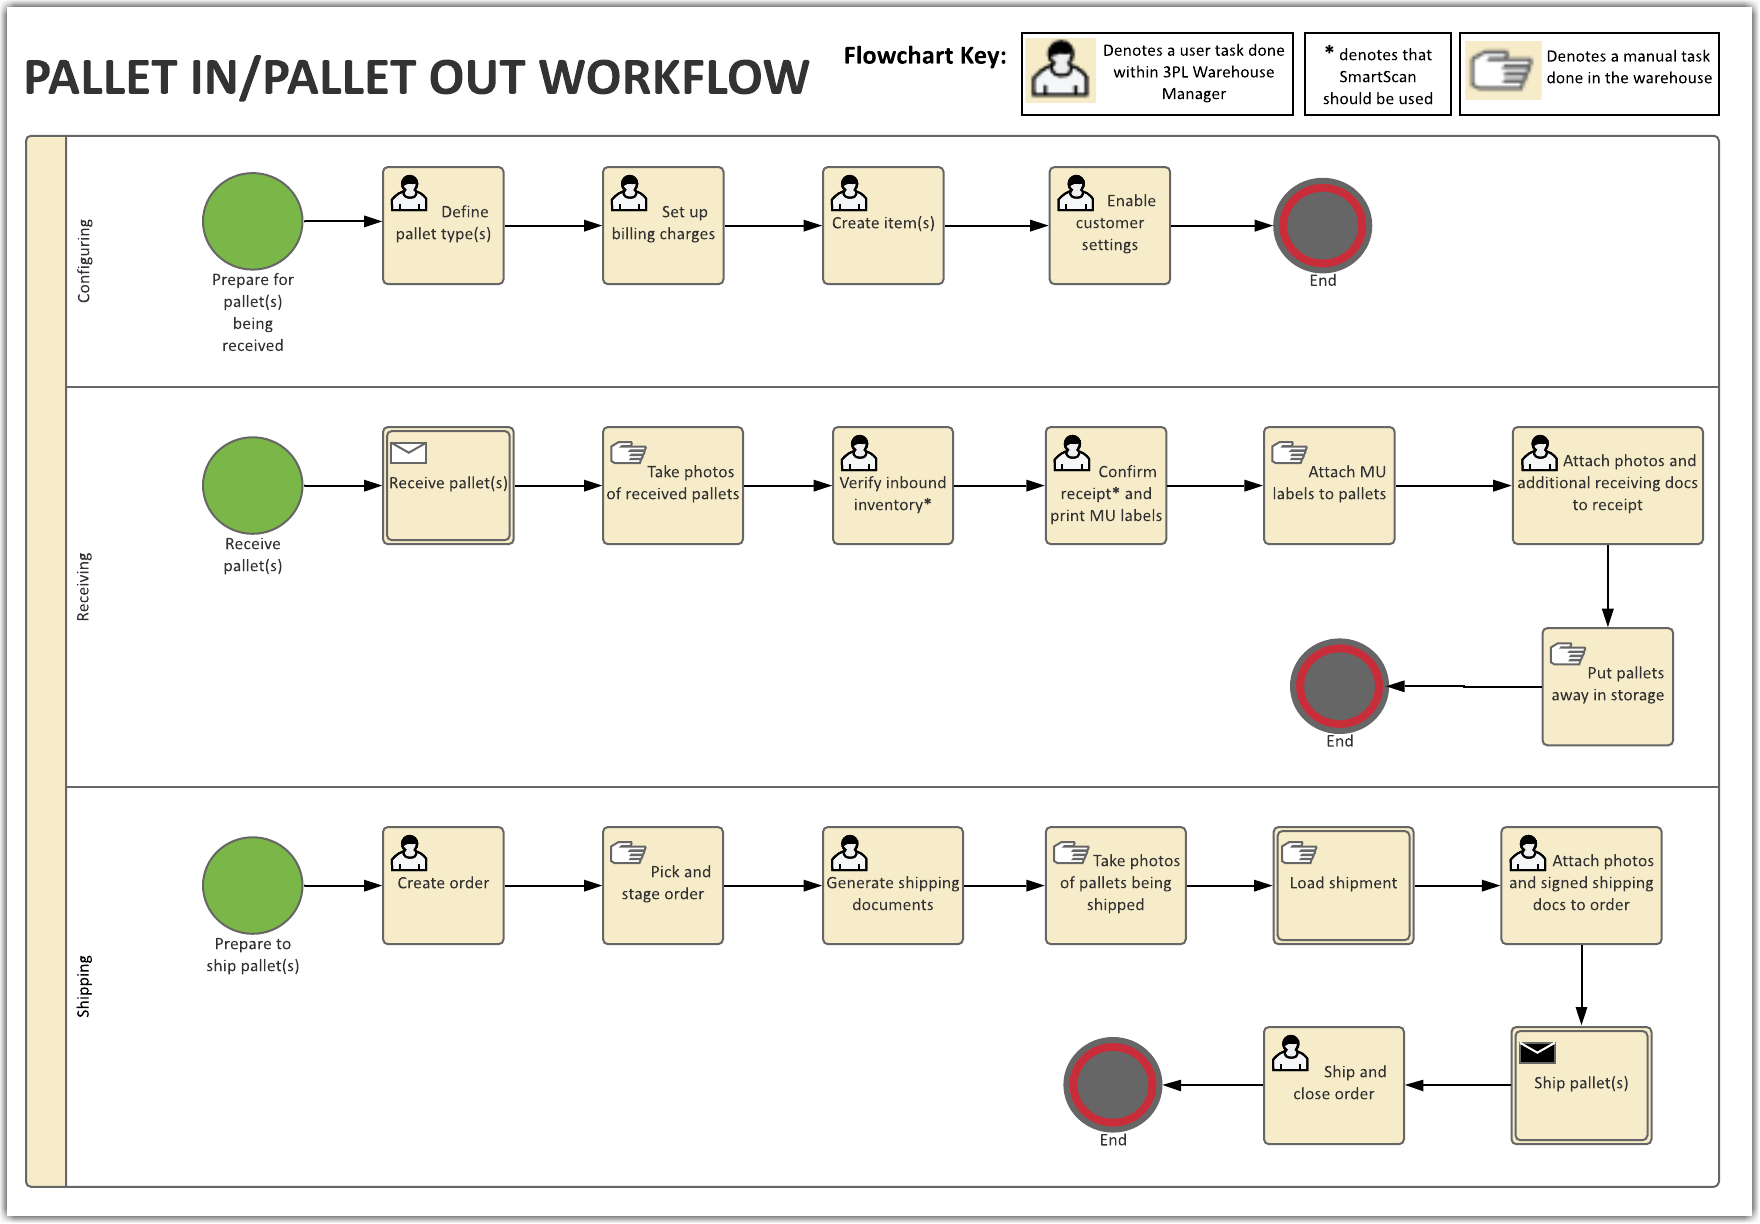
Below is a flowchart of the overall process of a pallet in/pallet out workflow, which is further detailed in this article. To enlarge, right-click the image and select "View image" or "Open image in new tab"—the verbiage depends on your web browser.
Preparing for Pallets
For your initial configuration using a pallet in/pallet out workflow, you need to define your pallets, set up billing and items, and create a receipt in 3PL Warehouse Manager.
After you prepare for this workflow the first time, you only need to create a receipt for each time thereafter.
Step 1: Define your pallets
Since different types of pallets can determine different charges for billing, it is important to define the specific pallets you ship and receive and stay consistent in your use of each type.
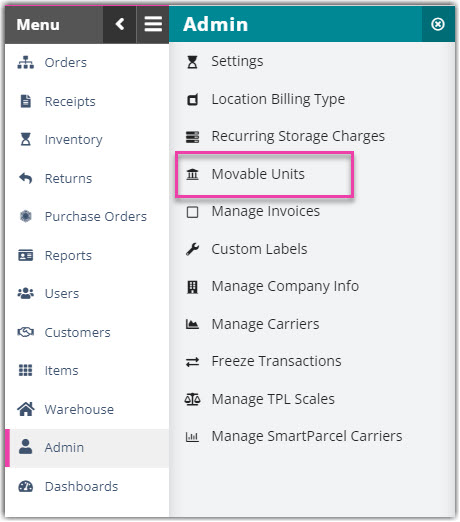
- Navigate to Admin > Movable Units in 3PL Warehouse Manager, then click Add.
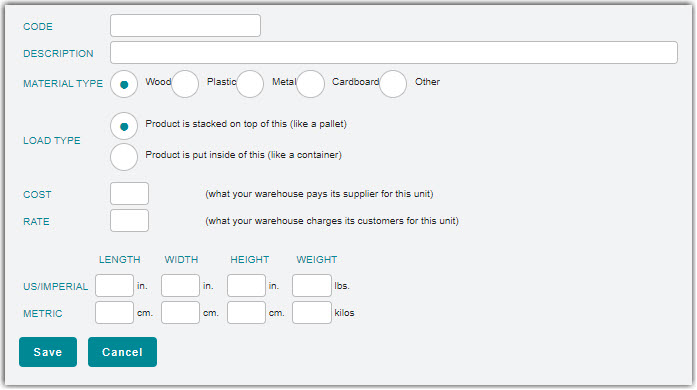
- Enter a 'Code', such as Gaylord, CHEP, or Grade A.
- Enter a 'Description' for this pallet type.
- Select which 'Material Type' the pallet is made of and the 'Load Type'.
- Enter a 'Cost', 'Rate', and the dimensions for this pallet type. Note that once you enter dimensions for US/Imperial or Metric, the other values populate with the equivalent measurements.
- Click Save.
Repeat these steps for each pallet type you need to define.
Step 2: Set up billing
There are a variety of billing charges you can set up for a pallet in/pallet out workflow, but the primary rate that we recommend billing is the pallet handling fee.
A pallet handling fee bills your customer for your facility's handling of their inbound and outbound orders and thus needs to be set up for both receiving and shipping.
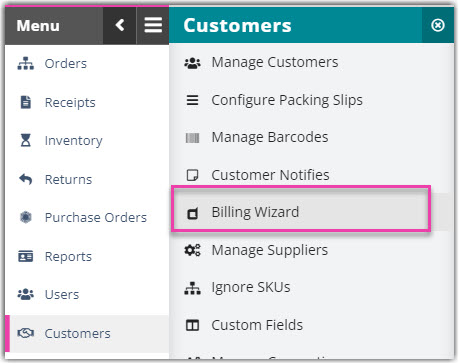
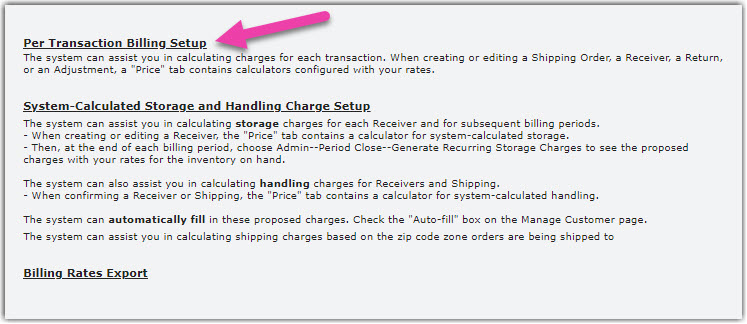
- Navigate to Customers > Billing Wizard > Per Transaction Billing Setup.
- Select a relevant customer from the drop-down menu, then click Select to activate the Shipping tab.
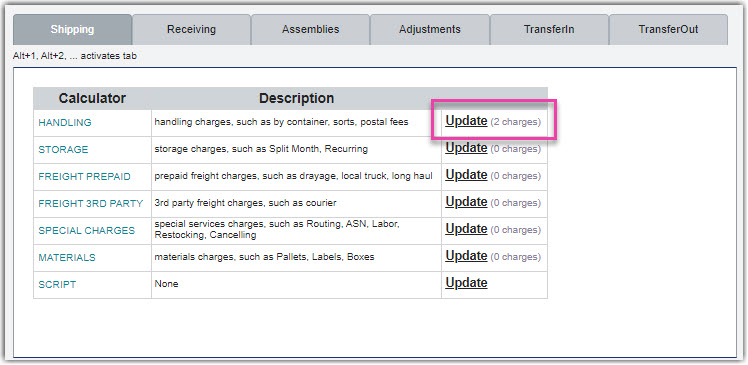
- Next to 'Handling', click Update.
- Click Add, then fill out the relevant information for the charge.
- For 'Charge Label', enter Pallet Handling.
- For 'Unit', select Pallet from the drop-down list.
- For 'Billing Type', select Auto.
- Enter any necessary 'Notes', 'Item ID', or 'Item Description'. The remaining fields are often most applicable for cases of international billing.
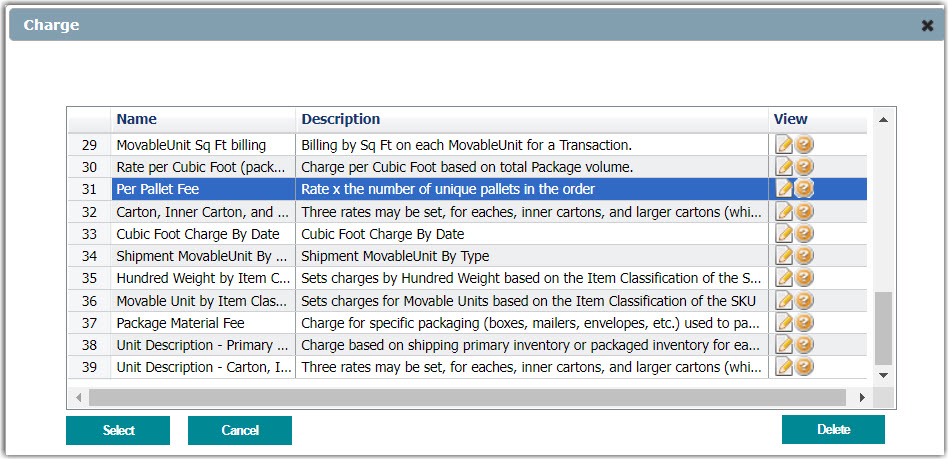
- Click Next, then locate the 'Per Pallet Fee' (typically in row 31).
- Select the script from the grid, then click Select.
- For the 'Charge', enter the price you'd like to charge for each unique MU shipped in an order, then click Save.

The new fee populates in the grid, and your customer is automatically charged the specified rate for each order shipped. - Click Back at the bottom of the page, then click the Receiving tab. Repeat Steps 3–7 to set up the receiving script.
Repeat Steps 2–8 for each customer as needed.
Step 3: Set up items
There are two scenarios when receiving pallets: receiving known commodities or receiving generic pallets. When setting up an item for a pallet with known commodities, it needs to be identified by the specific SKU. When setting up an item for a pallet with unknown commodities, it needs to be identified as a generic pallet.
If you receive both types of pallets, you need to set up items for both scenarios—please note that it is the same setup for both types, except the name you enter for the SKU field in Step 3.
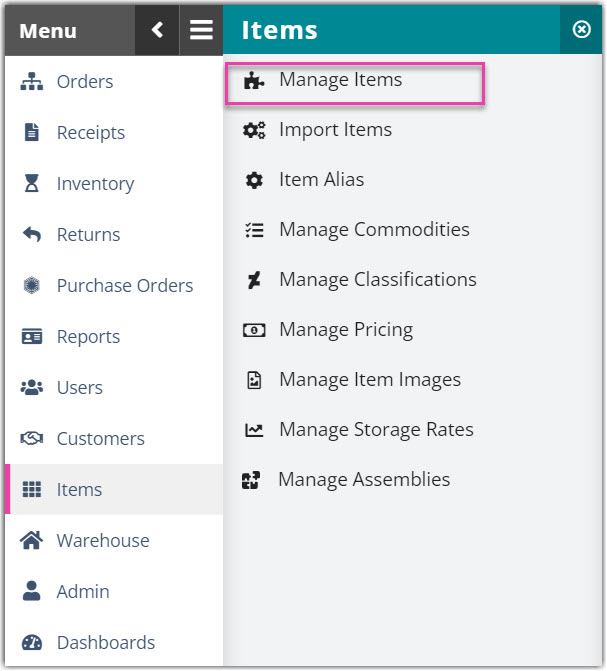
- Navigate to Items > Manage Items.
- Under the 'Filter Criteria', select the relevant customer from the drop-down list.
- Click Create, then enter the necessary information for the item—note that required fields are outlined in red. Below are a few recommendations:
- For 'SKU', understand which type of pallets you are receiving.
- If you are receiving known commodities, enter the name of the commodity.
- If you are receiving unknown commodities, enter Pallet.
- For 'Lot Number Tracking', choose to Track by Lot Number—do not require it unless this is necessary for your operations.
- Utilize 'Directed Putaway'.
- In the 'Units of Measure' section, define the 'Primary UOM' and 'Packaging UOM' as a Pallet.
- Enter the 'Primary Units Per Packaging Unit' as 1 and the accurate 'Length', 'Width', and 'Height' dimensions.
- For 'Movable Unit', select a pallet type from the drop-down list. Designate the accurate dimensions, and enter the Quantity as 1.
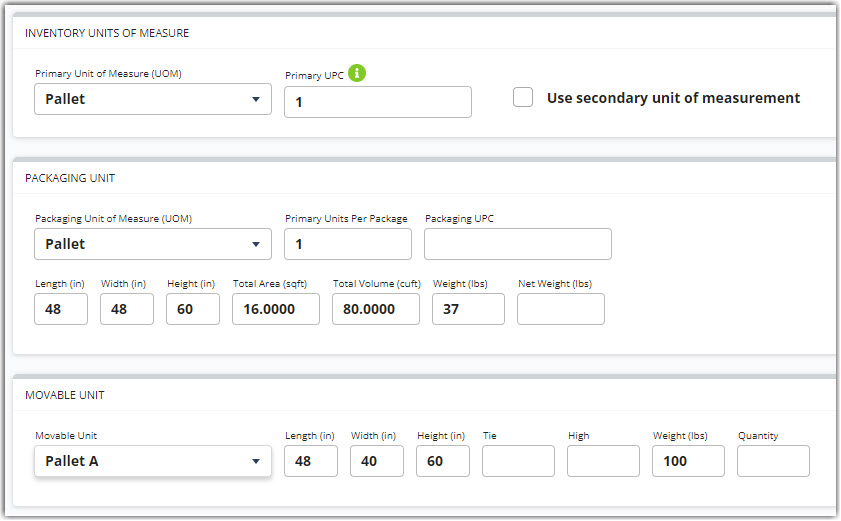
The dimensions you list for this pallet is crucial in its effect on billing—please ensure accuracy when measuring your pallet.
- For 'SKU', understand which type of pallets you are receiving.
- Once you have completed all the relevant fields, click Save.
For known commodities, repeat Steps 3 and 4 for each known commodity you plan to receive.
Step 4: Enable customer settings
There are several customer settings we recommend enabling to streamline this best practice workflow.
- Allow location tracking
- When confirming a receipt, default to Auto-allocate to Complete Orders
- Enable Suggested Putaway
- Receive Against ASN
- Default Quantity = 1
To enable each setting for a customer, navigate to Customers > Manage Customers, select the customer from the grid, then click Edit.

Continue reading below for more information on each individual setting, then enable these settings for each customer as needed.
Allow location tracking
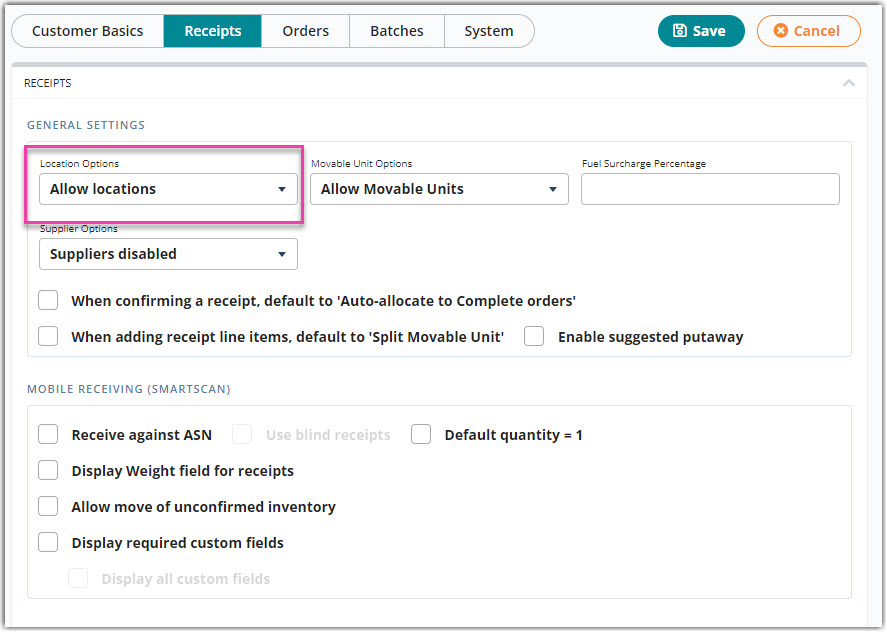
For most workflows, you must have the location track-by enabled for each of your customers so that you can place inventory into a specified location.
Select the Receipts configuration section, locate the 'Location Options' field, then select Allow locations from the drop-down list.
When confirming a receipt, default to Auto-allocate to Complete orders
When you confirm a receipt, there is an 'Auto-allocate to Complete orders' option to specify you'd like to allocate the inventory to Complete orders. If you enable this setting by default in your customer setup options, you save time by not having to select it each time you confirm a receipt for that customer on the Edit Receipts page.
To enable, click the selection box next to When confirming a receipt, default to Auto-allocate to Complete orders.
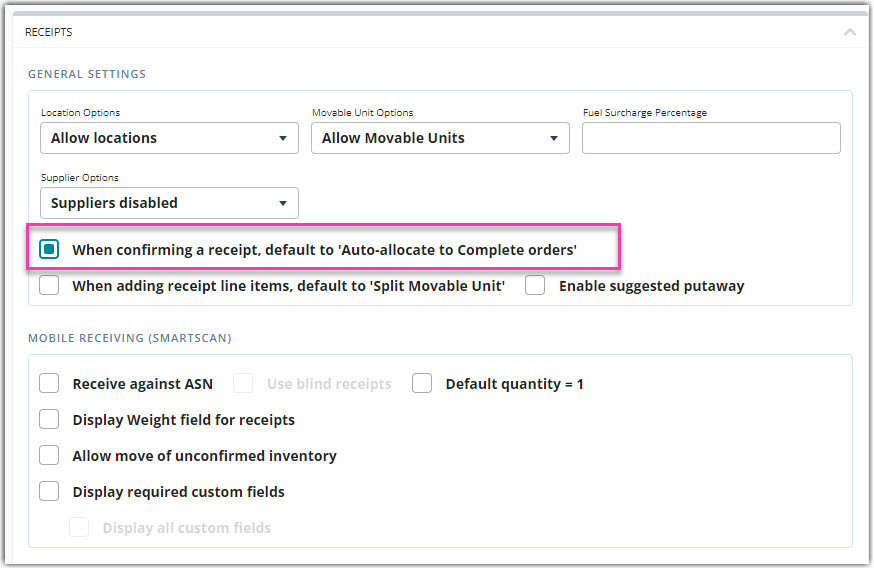
Next time you confirm a receipt from the Edit Receipts page, the 'Auto-allocate to Complete orders' option is checked by default and the inventory auto-allocates to relevant orders.
Enable Suggested Putaway
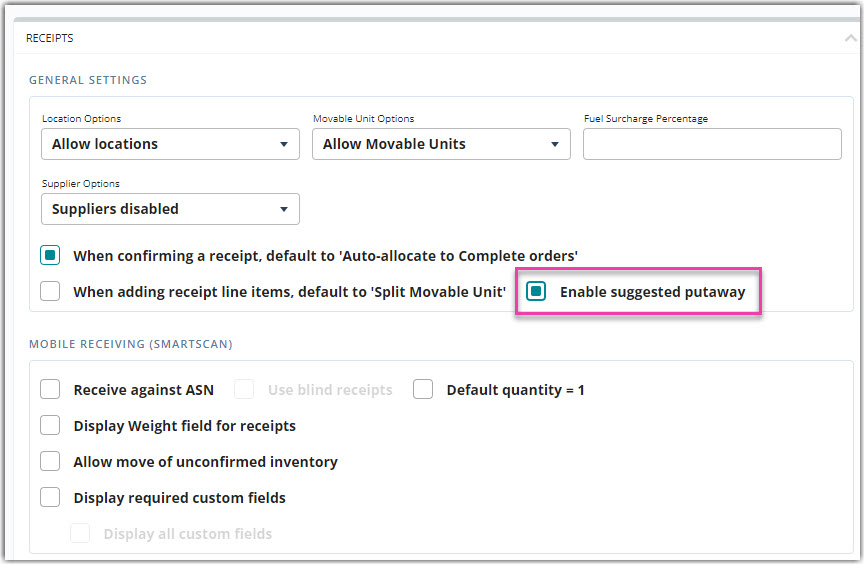
The Suggested Putaway feature provides a list of locations when you're receiving items so that you can easily consolidate like SKUs into a single location. Suggested putaway is important because it provides insight into the location of inventory in case you need to store similar inventory together in the warehouse. It also saves you time from having to manually search for a storage location when you're receiving each pallet.
To enable this option, click the selection box next to Enable Suggested Putaway.
Receive Against ASN
While there are a number of ways an ASN can be created within 3PL Warehouse Manager, we recommend using the Receive Against ASN (RAASN) functionality for this workflow. RAASN must be enabled for your account, as well as enabled in each relevant customer's setup.
Under Mobile Receiving (SmartScan), click the selection box next to Receive Against ASN.
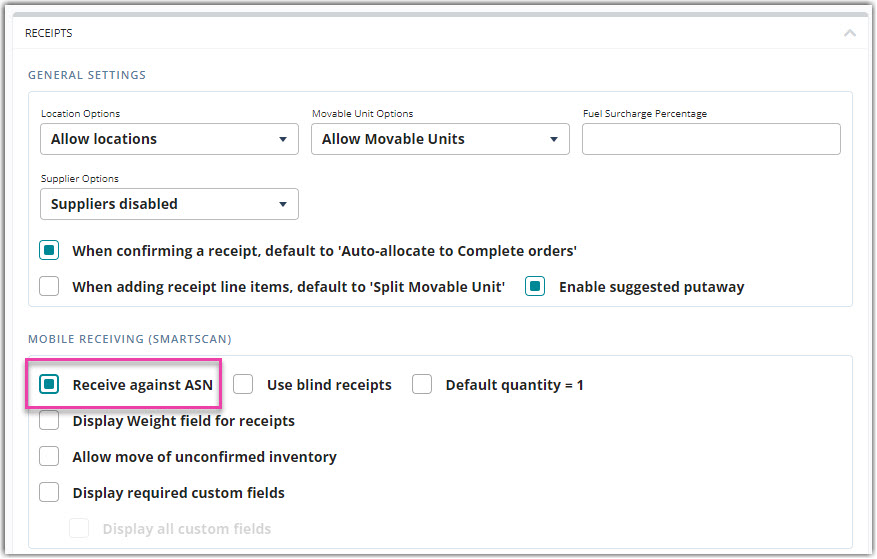
Once you receive the ASN from your customer, all you have to do is wait until the pallets arrive to your facility.
Default Quantity = 1
If you have the 'Default Quantity = 1' setting enabled, the Quantity field automatically populates as 1 each time you scan a line item. This setting is especially important for saving you time when receiving pallets.
Under Mobile Receiving (SmartScan), click the selection box next to Default Quantity = 1.
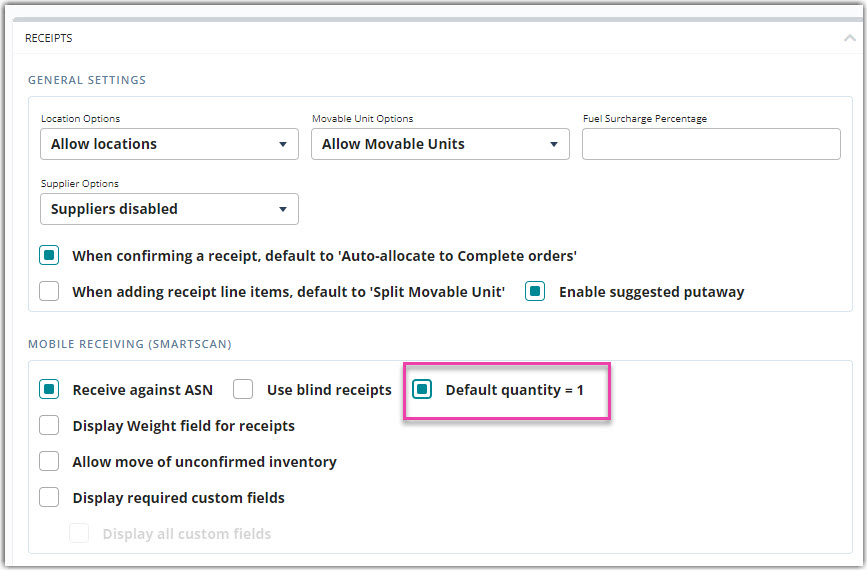
Make sure you click Save to confirm all of these changes.
Receiving the Pallets
Once you've completed all the proper configurations in the system, you're ready to receive against the ASN using SmartScan.
When the pallets arrive to your facility, it is best practice to take photos of the received pallets to document the conditions in which they were received for your records.
Step 1: Verify inbound inventory
- Log in to SmartScan.
- Ensure the relevant 'Warehouse' is selected from the drop-down list, then select the Receipts module.
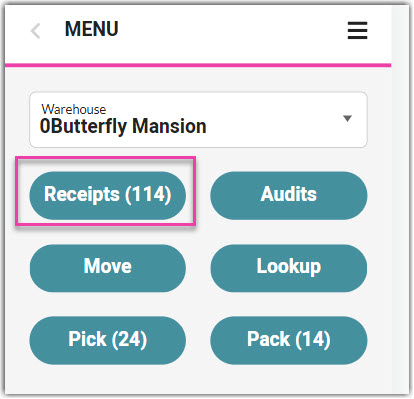
- Ensure the relevant customer is selected from the drop-down list. All open and complete receipts display in the order of the latest 'Created Date'.
- Select the relevant receipt from the grid.
- Scan the SKU barcode of the first pallet, as well as any associated track-by's to verify accuracy (or manually enter any values that need to be modified), enter the quantity received, then tap Next.
Note: If using a consumer device, you must first select a line item from the grid to verify the received SKU before you can begin scanning.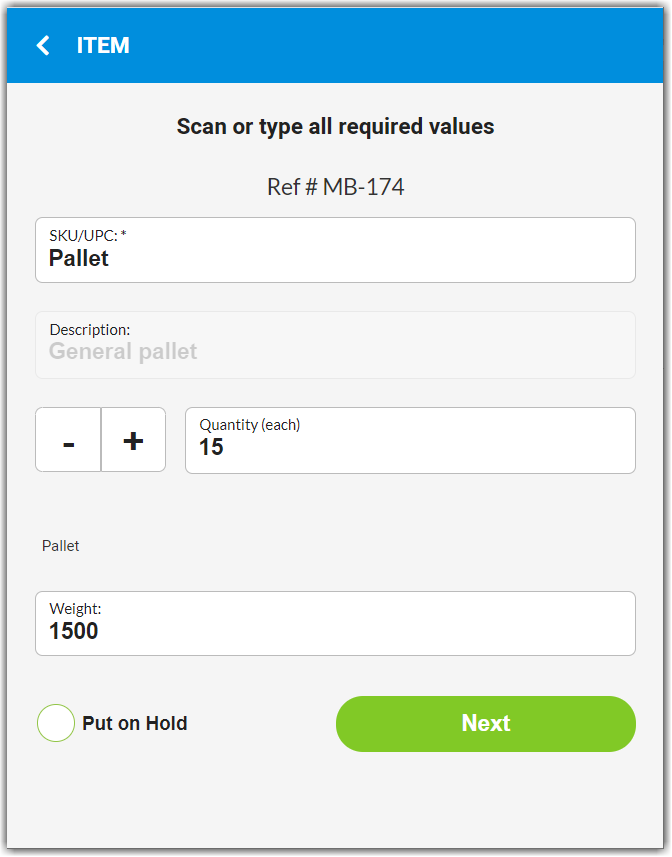
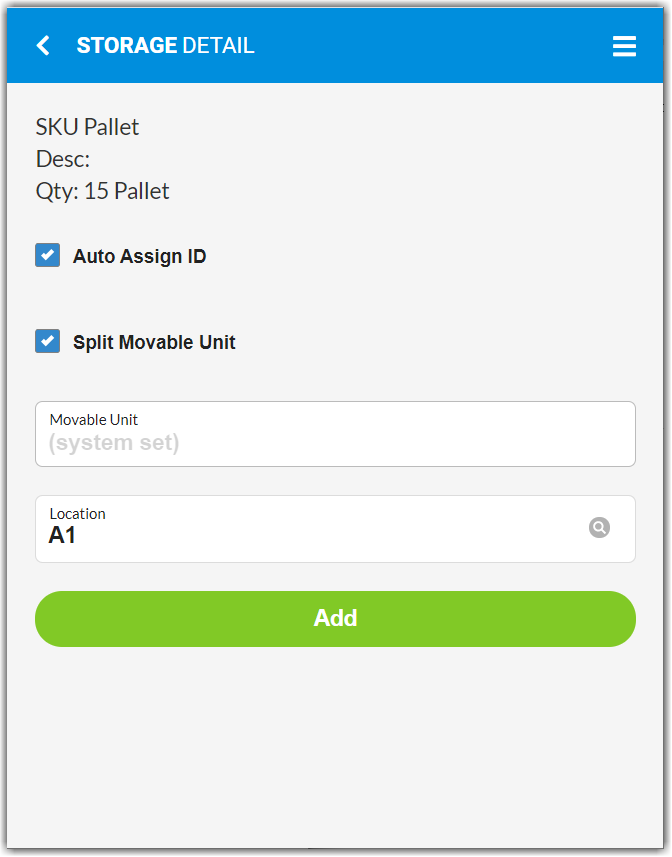
- Enter the storage details.
- If the pallet has a unique license plate value, scan the MU label.
- If you need the system to assign a license plate, select Auto Assign ID, then select a Movable Unit Type.
- If you are receiving multiple pallets under one line item, select Split Movable Unit to split each pallet into individual line items.
- Scan your staging location.
- Tap Add.
- If you are receiving more than one SKU, repeat Steps 5 and 6 until all SKUs are verified.
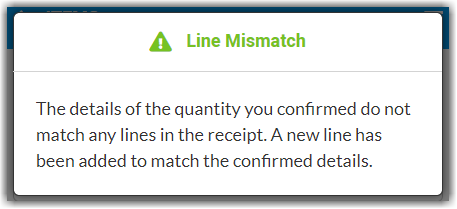
- If the actual quantity received differs from the expected quantity, a 'Line Mismatch' message appears and a new line item populates in the grid with a red check and no 'expected quantity'.
- Once all pallets are added as line items on the receipt, it's time to confirm the receipt.
Step 2: Confirm the receipt
The method in which you confirm the receipt depends on whether you received pallets with their own unique license plate IDs or whether you chose to 'Auto Assign ID' in Step 6 in the previous section. Proceed with the applicable method of confirming.
- The pallets came in with their own unique license plate IDs. While you still have the receipt open in SmartScan, tap Confirm, ensure the charges are correct, then tap Confirm again to confirm the receipt.
- The system automatically assigned MU labels to the pallets. You must confirm the receipt in 3PL Warehouse Manager.
- Log in to the system, then locate the receipt under Receipts > Find Receipts. If needed, use the search filters in the left pane and click Search to refine the results displayed in the grid.
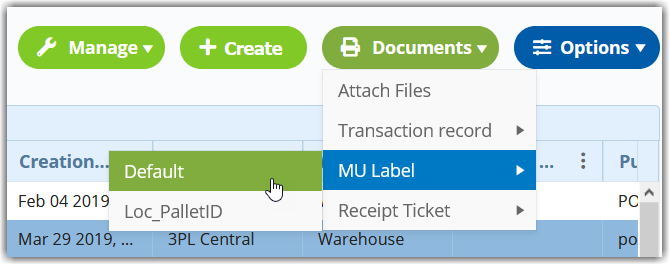
- Select the receipt from the grid, then click Documents > MU Label, and select a label template to generate the auto-assigned license plate IDs.
- Once generated, print the MU labels, then apply the labels to each pallet so that they can be properly identified when moving within and shipping out of your facility.
- After the MU labels are applied to the pallets, click Manage > Confirm Receipt, enter the relevant 'Transport Information' and any 'Additional Charges' that may have accumulated, then click Confirm. A confirmation message appears.
Step 3: Attach files (optional)
If you took photos of the pallets when they arrived to your facility, this is a good time to attach the images to the receipt in 3PL Warehouse Manager.
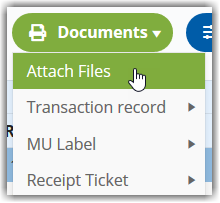
Locate and select the relevant receipt in the Find Receipts grid, then click Documents > Attach Files. Click Browse, select an image, click Attach, then repeat for each image needed.
Step 4: Store the pallets
Once you have confirmed the receipt, you use each pallet's unique MU label to move the pallets from staging to the proper storage location in your warehouse using SmartScan.
If you need to move the pallets to a different location in your facility at a later time, use this same process.
- Move each pallet to the appropriate storage location.
- Log in to SmartScan.
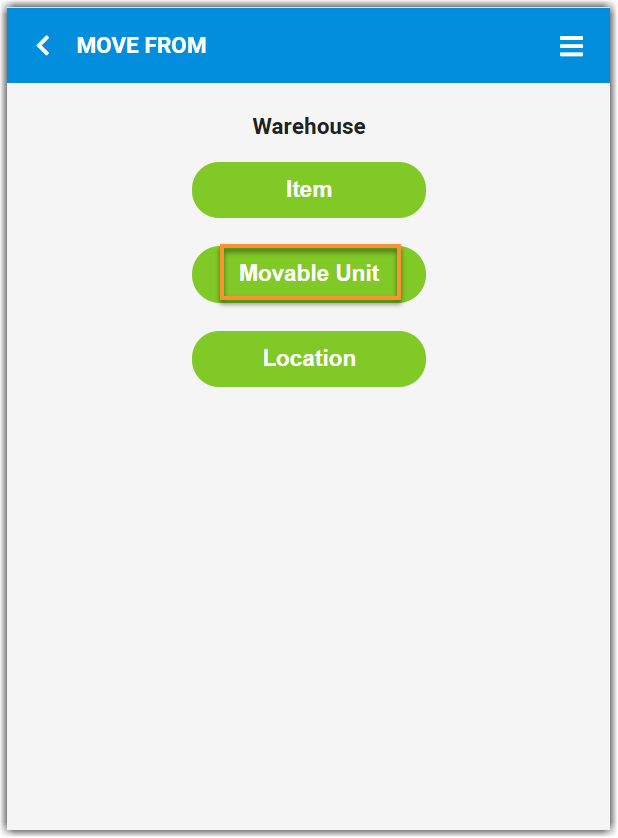
- Select the Move module, then tap Movable Unit.
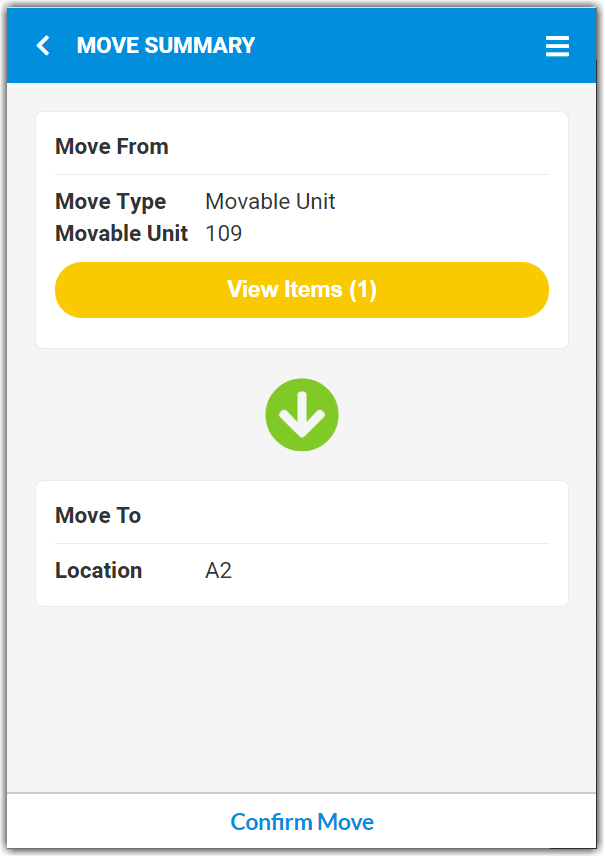
- Scan the MU Label of the pallet, then scan the 'Destination Location'.
- Ensure the Move Summary is correct, then tap Confirm Move.
- A confirmation message appears. Repeat Steps 3–5 for each pallet moved.
Shipping the Pallets
Step 1: Create an order
Once you're ready to ship one or more of the pallets out of your warehouse, you'll need to create an order for that shipment.
Navigate to Orders > Create Orders in 3PL Warehouse Manager.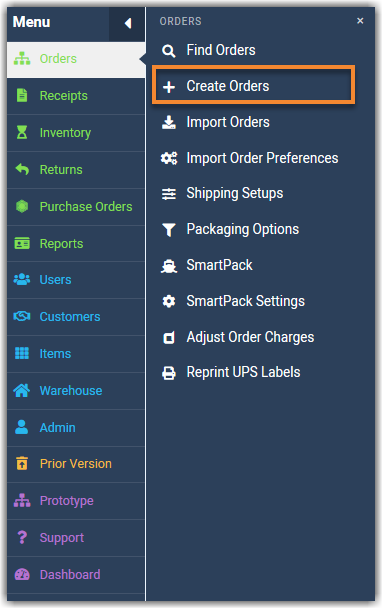
Select the relevant 'Customer' and 'Warehouse' from the drop-down menus, enter a unique 'Reference Number', then click Save.
As you fill out the relevant information for the order, refer to the following best practices to add items to your order in the Order Line Items section:
- If the commodity of the pallet is known, use the following steps to guide you. If not, continue to the next set of bullets.
- Click Add.
- Select the SKU from the drop-down list, enter a Quantity, then click Add.
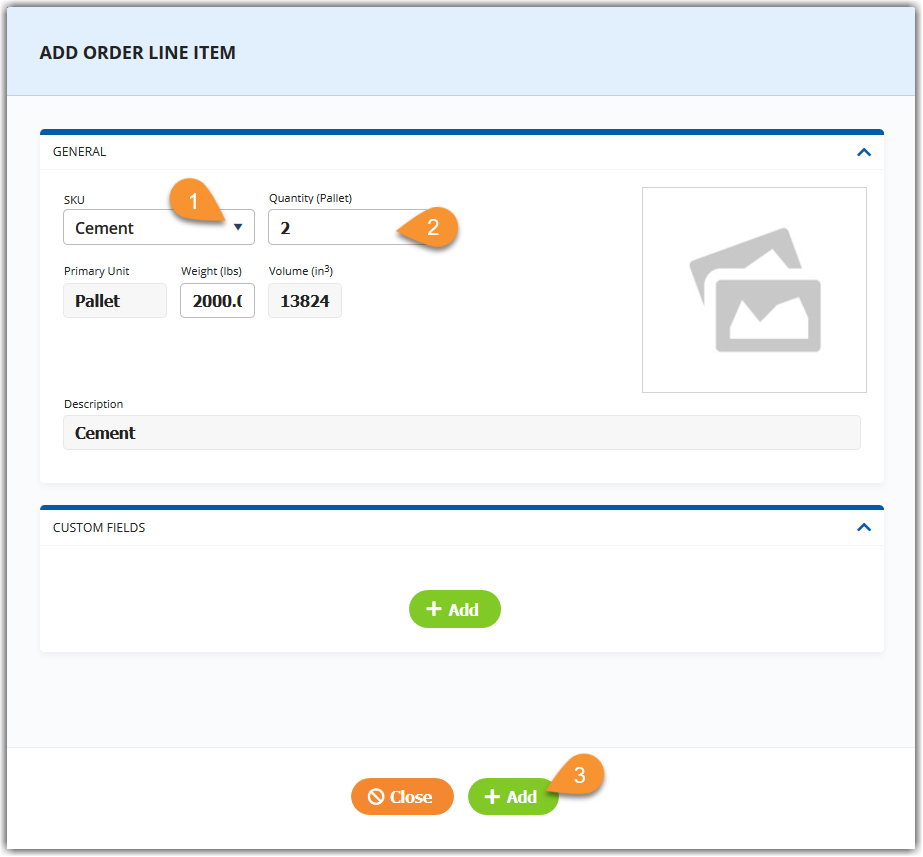
- Once you've added all the relevant line items, click Close to return to the order.
- If the commodity on the pallet is unknown, click Mass Add.
- Use the search filters in the left pane if you need help identifying the specific pallets you need to ship.
- Select Options > Columns to add or remove columns which display in the grid.
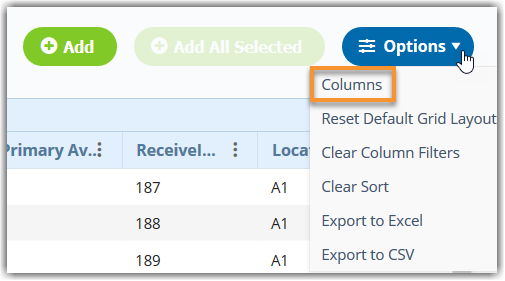
- If desired, drag and drop the columns to your preference, or adjust the sorting of the grid by clicking on the column header you wish to sort by.
- Once you find the specific pallets needed for the order, select the relevant field under the 'Primary Qty to Add' column, enter the appropriate quantity for each pallet, then click Add.

- Once you've added all the relevant line items, click Close to return to the order.
When you're done filling out the details of the order, click Mark as Complete before you proceed to pick the order.
Step 2: Pick the order
Single order pick jobs work best for larger items and full pallets. These pick jobs are automatically populated in SmartScan, so there is no need to assign a pick job on the Find Orders page.
- To get started, log in to SmartScan.
- Ensure the appropriate 'Warehouse' is selected from the drop-down list, then tap the Pick module. Note that the number displayed reflects the number of orders available to pick.
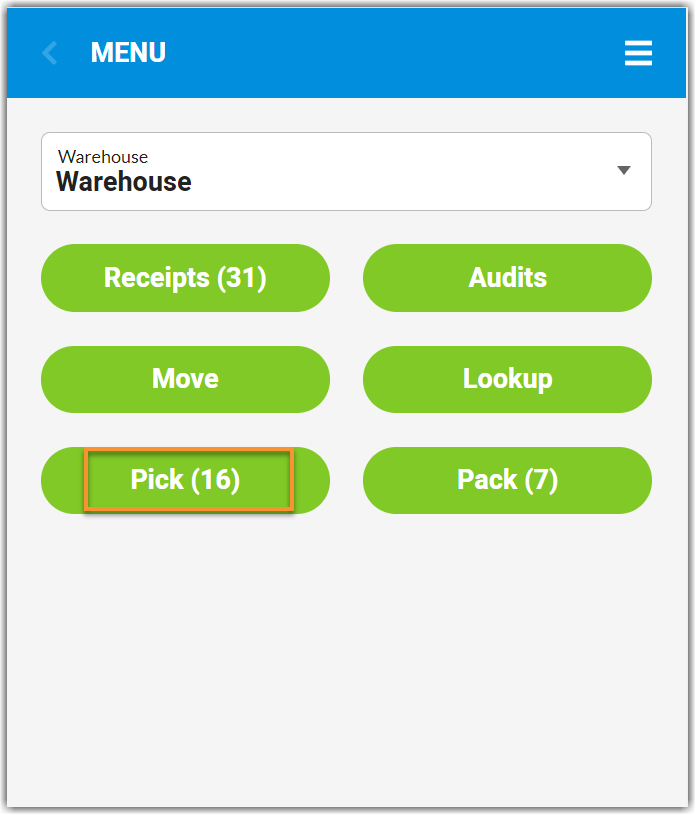
- Tap Single Order Pick Job.
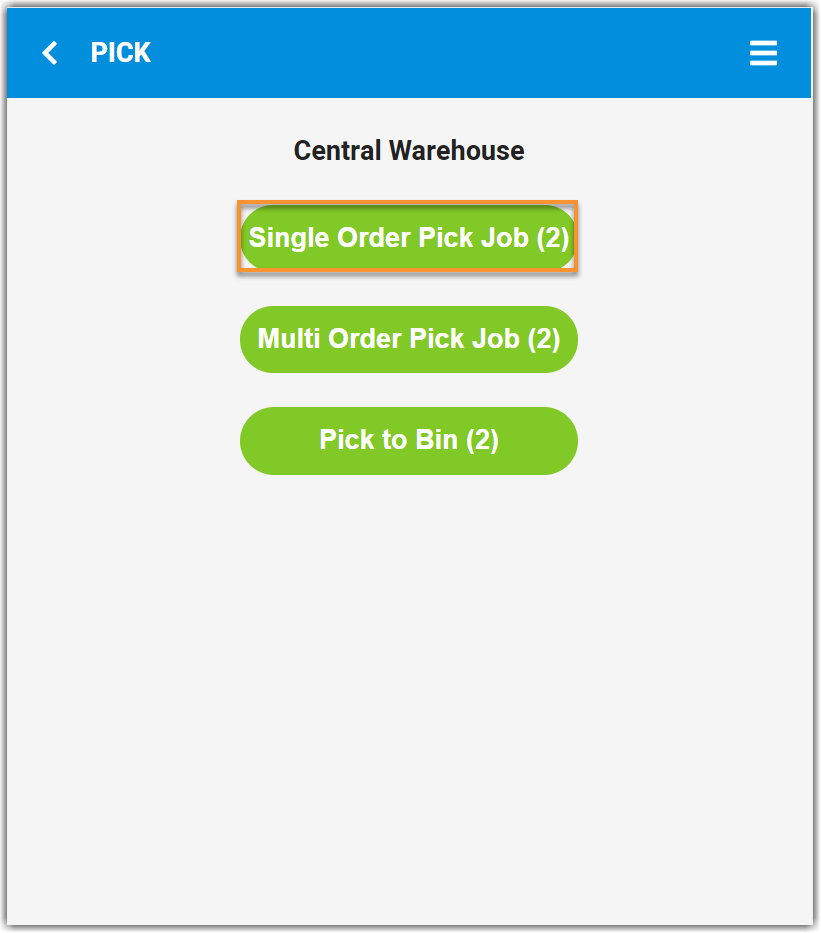
- To pick a specific order, scan the associated transaction number or tracking number.
- To begin the order shown, tap Start Pick.
- To skip to the next prioritized order, tap Skip Pick. Once all orders are skipped, there is an option to 'Reset Pick' to the beginning of the pick job list.
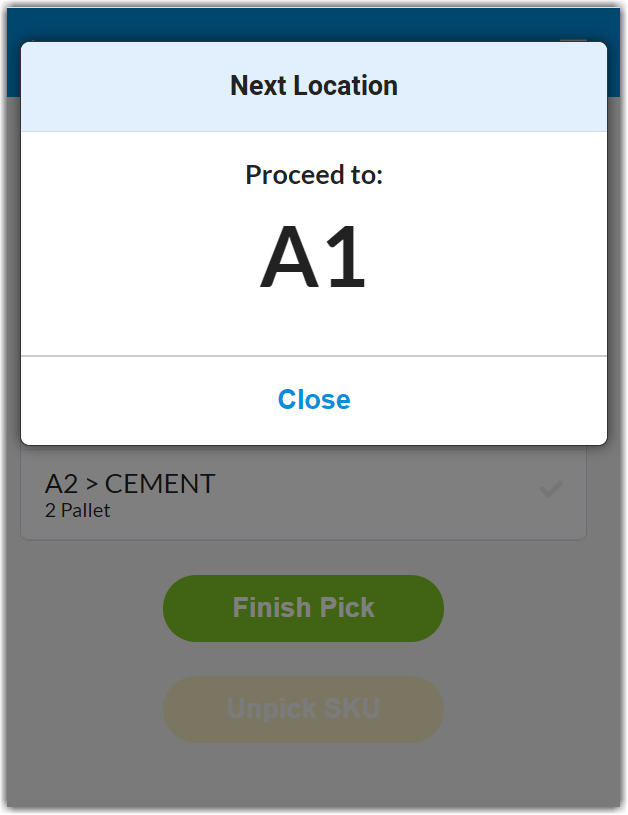
- If a specific location is associated with the pick job, SmartScan directs you to proceed to that location.
- Once the Pick SKU/UPC dialog opens, scan the 'Movable Unit' that was assigned to the pallet when the receipt was created, the 'SKU/UPC' for the first pallet, and any required track-by's, such as Lot Number or Serial Number.
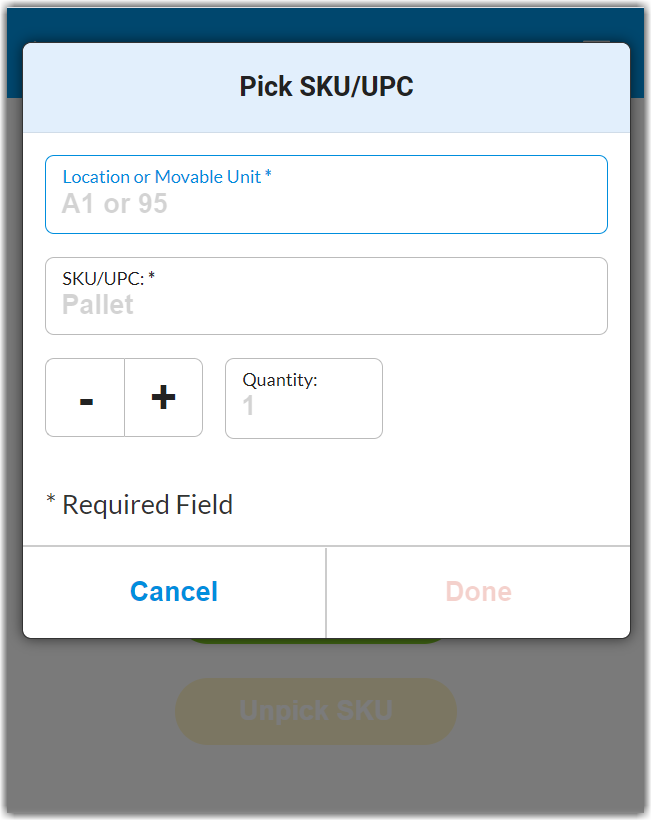
If you click Cancel to return to the pick list, you can search for a specific SKU, UPC, or MU by typing or scanning the respective value. SmartScan will open the first line item that matches the specified value.
- Enter the 'Quantity' of the pallet, then tap Done. The line item populates a green check to indicate the inventory has been picked.
- Repeat Steps 4 and 5 until all pallets are accounted for. If you have multiple pages of line items to pick, tap one of the bottom arrows to navigate to the next or previous page of line items.
To unpick an item, select the appropriate line item, then tap Unpick SKU. Repeat the pick as needed.
- Once you have completed the pick job, tap Finish Pick. A confirmation message appears.
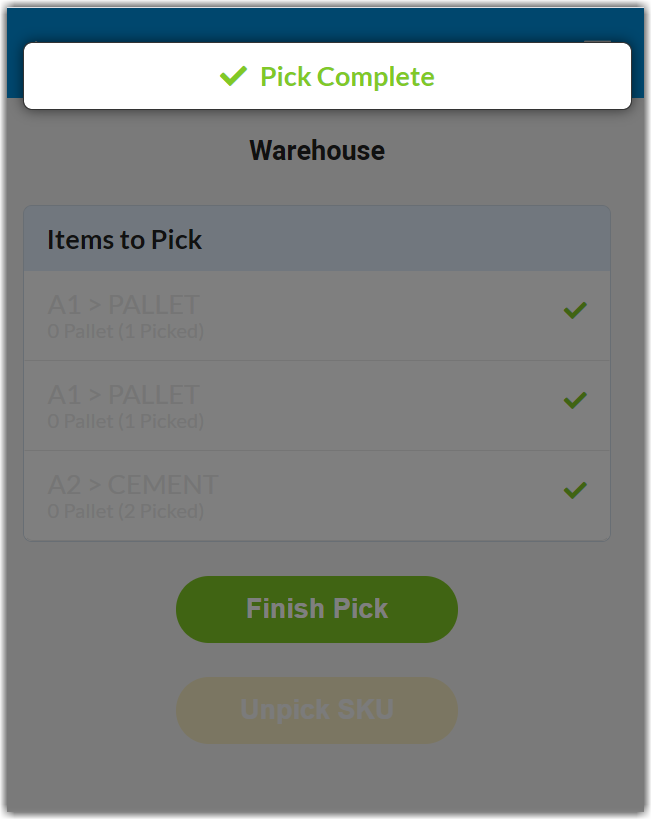
The pick job is removed from SmartScan, and the 'Pick Done Date' column populates with the appropriate data in the Find Orders grid.
Step 3: Generate packing slips and bill of lading
3PL Warehouse Manager contains a standard packing slip standard and a retail-compliant bill of lading (BOL) template to accompany the shipment. Both can be generated on the Find Orders page.
- To get started, locate the relevant orders on the Find Orders page in 3PL Warehouse Manager.
- Select the relevant orders from the grid, then click Documents > Packing Slips.
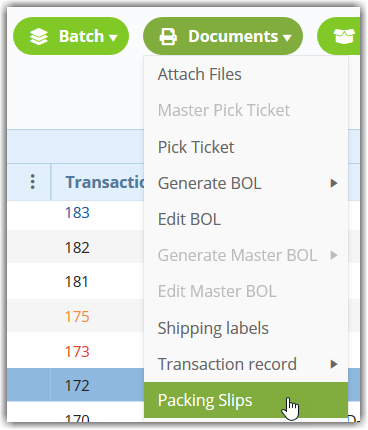
- Ensure the appropriate version, template, and export format is selected, then click Generate.
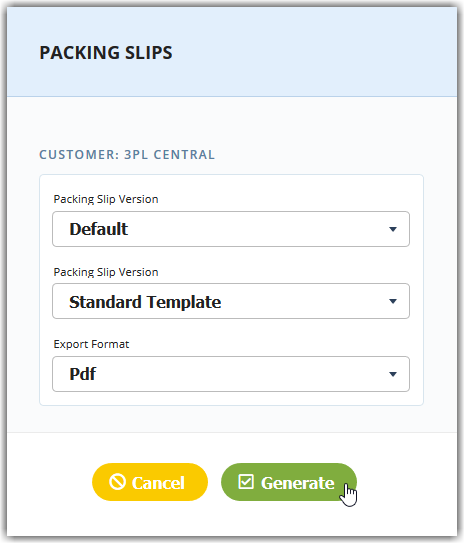
A confirmation message appears, and the packing slip(s) generate in the selected format. - To generate the BOL, click Documents > Generate BOL, then select the appropriate template.
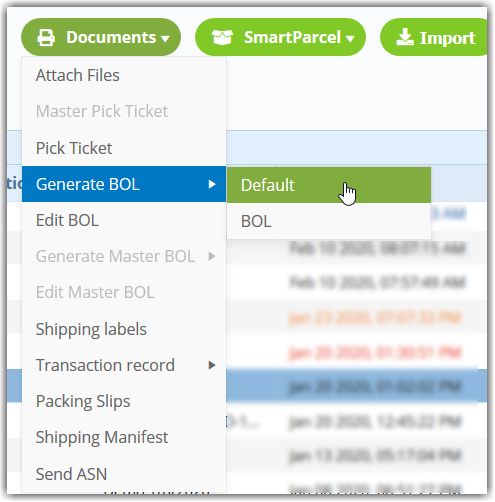
The BOL opens as a PDF file in a new tab of your browser for you to print using your preferred method. - Affix the packing slips to the pallets, and store the BOL in a safe place to provide to your driver when the pallets are ready to ship.
Step 4: Attach files (optional)
Similar to taking photos of your pallets when they arrive to your facility, it is best practice to also take photos of the pallets when they leave your facility.
Documenting the conditions in which the pallets are shipped out of your facility can help dispute potential chargebacks for any unintended circumstances that may occur once the pallets leave your warehouse.
To attach the photos to the relevant order, select the order from the Find Orders grid, then click Documents > Attach Files.
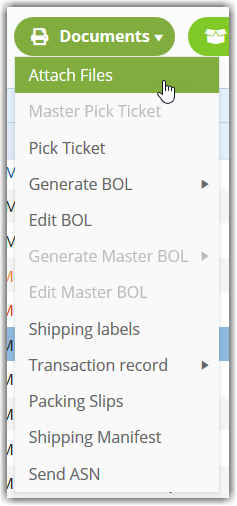
Click Browse, select a relevant file from your device, then click Attach. Repeat for each photo, then select Done when you're finished attaching the files.
Step 5: Ship and close the order
Once your pallets are ready to ship, it's time to close the relevant order(s) from the Find Orders page.
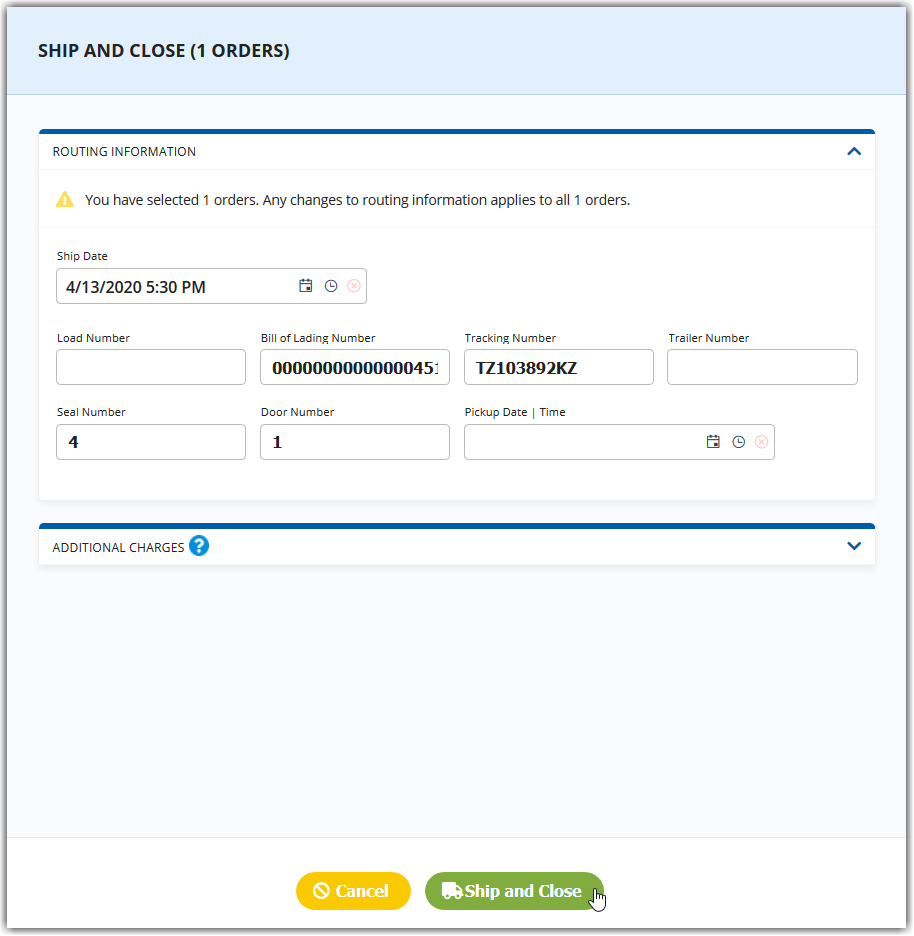
To do so, select the relevant order(s) from the grid, then click Manage > Ship and close to open the Ship and Close dialog.
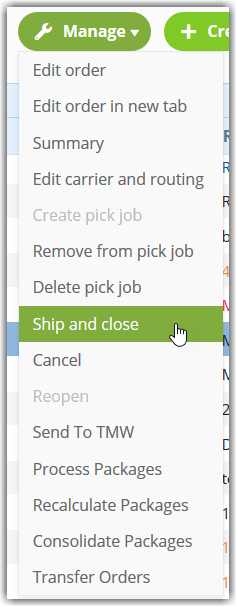
Modify the 'Routing Information' and 'Additional Charges' as needed, then click Ship and Close.
