SNAP Export
To export data using SNAP,
- The first thing you'll need to select is which 'Datatype' you wish to export. Examples would include, bins, items, assets, SO's or PO's.

- For this example, we will select Items (Non-serialized inventory numbers). Click next after selecting the Datatype.

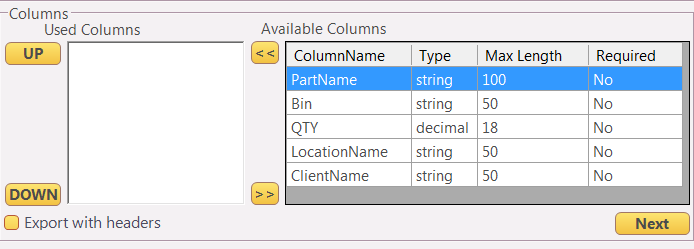
- Now we need to select which columns we want to end up in our .csv file. Highlight the column from the section on the right and use the
 button to move it to the 'Used Columns' section. If you want headers (labels on each column in the csv) check the Export with headers checkbox.
 - Use the Up and Down buttons to arrange the columns as you want them to be displayed on the .csv file.
- Once we have all the columns we need, click the 'Next' button.
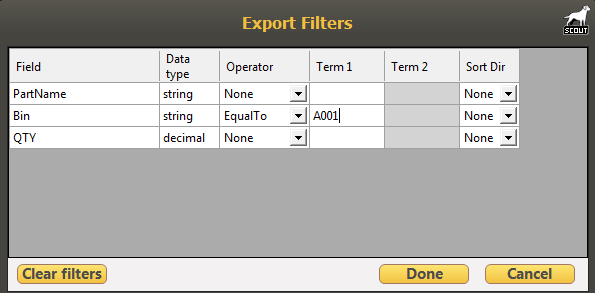
- After you click Next here, you will notice a Clear Filters button that appears. If you want to filter the data that is being exported, click the Clear Filters button.

- For this example, I only want to get my inventory levels from bin A001. You can set up a filter for each column if you'd like.
- Next, we need to select the location and filename of the .csv to be created. Click next when complete.

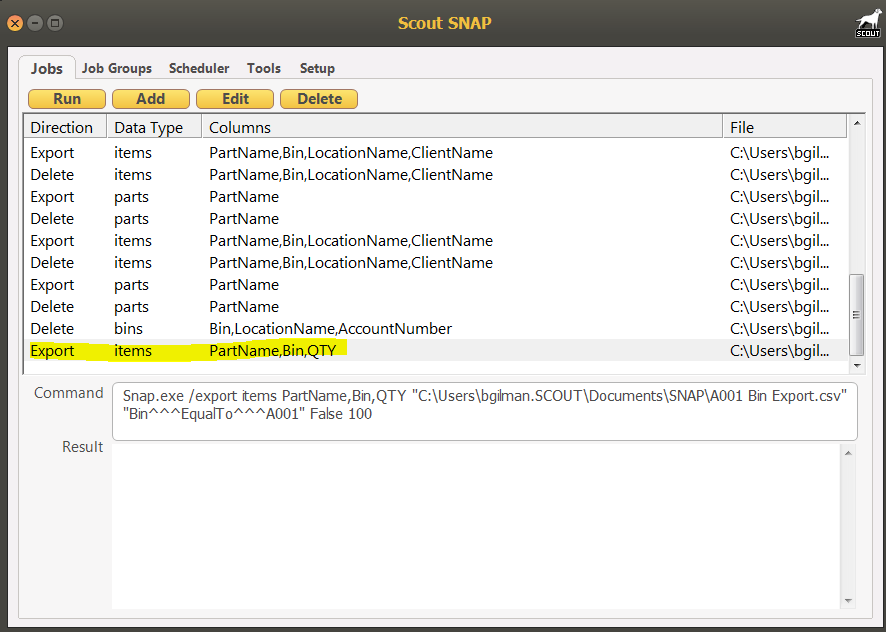
- Notice that the SNAP job is translated into a command line. This can be used by I.T. to be run in background processes.

- Click OK when finished.
- Now the job we've just created shows up in our main Jobs list. To run this job, highlight it and click the Run button. After completed the .csv file will be placed in the location designated when creating the Job.

