SNAP Import
SNAP Import
To import data using SNAP,
- The first thing you'll need to determine is which 'Datatype' you'll be importing. Examples would include, bins, items, assets, SO's or PO's.

- For this example, we will be importing Bins. Click 'Next' once the Datatype is selected.

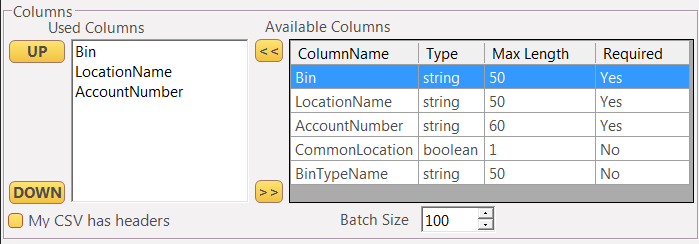
- Next, we need to match up the columns in our spreadsheet to the column in Warehouse Manager. For example, if column A in our spreadsheet is the Bin name it should be the first entry in the 'Used Columns' list. You can add or remove columns using the
 buttons, and rearrange them using the 'UP' and 'DOWN' buttons.
 - If your .csv file has headers and you want to match them, check the My CSV has Headers checkbox. Once you have selected the file you can use the
 button to automatically configure the columns.
 The header names must match EXACTLY to the available columns in order for this to work; For example: If the header on your CSV says 'Location Name' with a space it will not work as the field name is ‘LocationName’
- Lastly, the Batch size can be edited here. Batch size indicates how many records at once to process. Typically you can leave this alone.
- After we have our columns configured, we need to point SNAP to the file we wish to import.

- Click next and 'OK' at the bottom to complete the job setup.

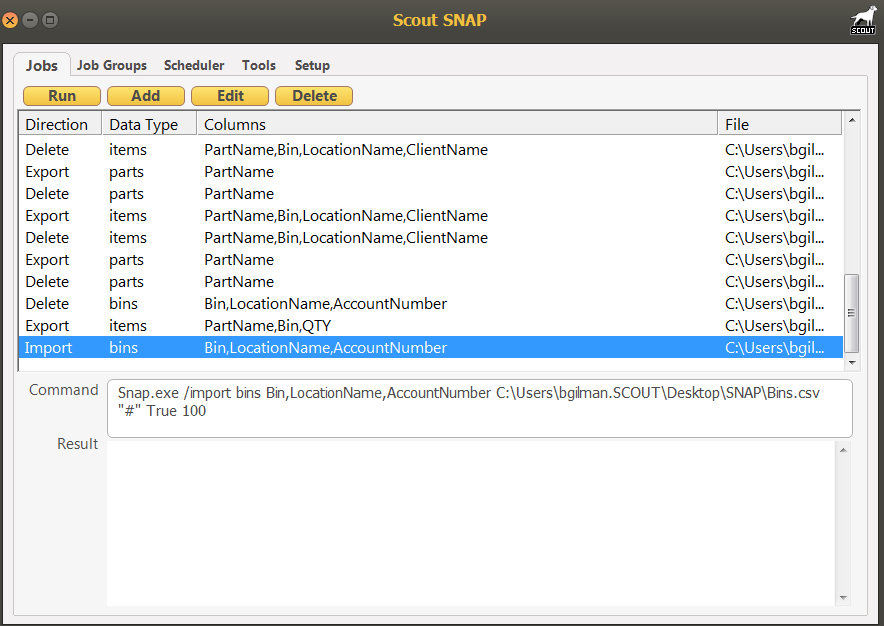
- Now the job will show up in your main Jobs list. Highlight and click 'Run' to run the import.
Remember that files to be imported must be in .CSV format and must NOT be open in Excel.
