Understanding Custom Fields
Custom fields (formerly known as flex fields) are most commonly used for EDI setups where specific line item data needs to pass into 3PL Warehouse Manager. Also referred to as saved elements, you can also use these fields to capture any data point that does not have a predefined field in the system.
There are two different types of custom fields: line item and transactional. There are also two places in which you can set up custom fields: under Customers > Custom Fields and on a transaction-by-transaction basis.
This article reviews the steps needed to create a custom field that can be applied across all transactions for a customer. Once configured, the custom fields display on the relevant transaction type, as well as on any desired custom reports or UCC labels.
To learn more about configuring custom fields on a transaction-by-transaction basis, please see Custom Order Info instead.
Note there are three requirements for accessing the Custom Fields page:
- You must have custom fields enabled for your account under Admin > Settings.
- Once enabled for your account, you must enable the use of custom fields for each relevant customer under Customers > Manage Customers by activating the 'Enable custom fields' setting under the System section.
- Users must have the following permission granted to their user role: Customer Module > Manage Custom Fields.
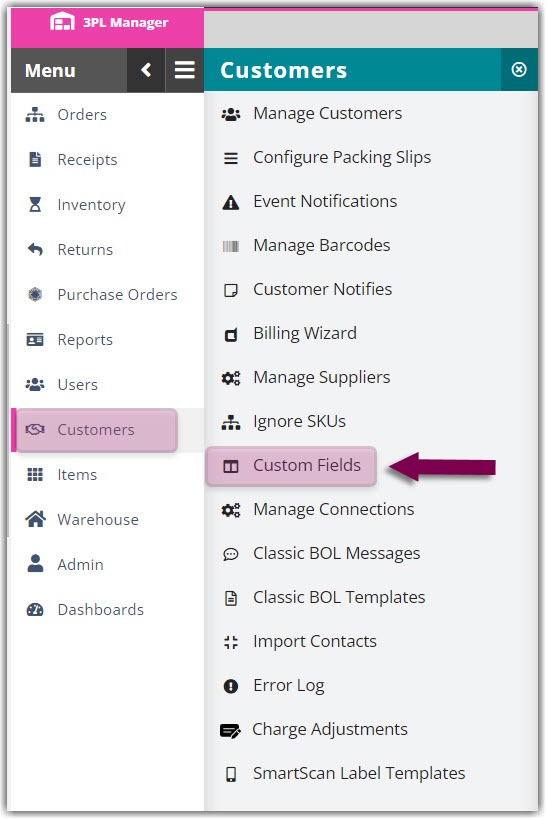
- Navigate to Customers > Custom Fields.

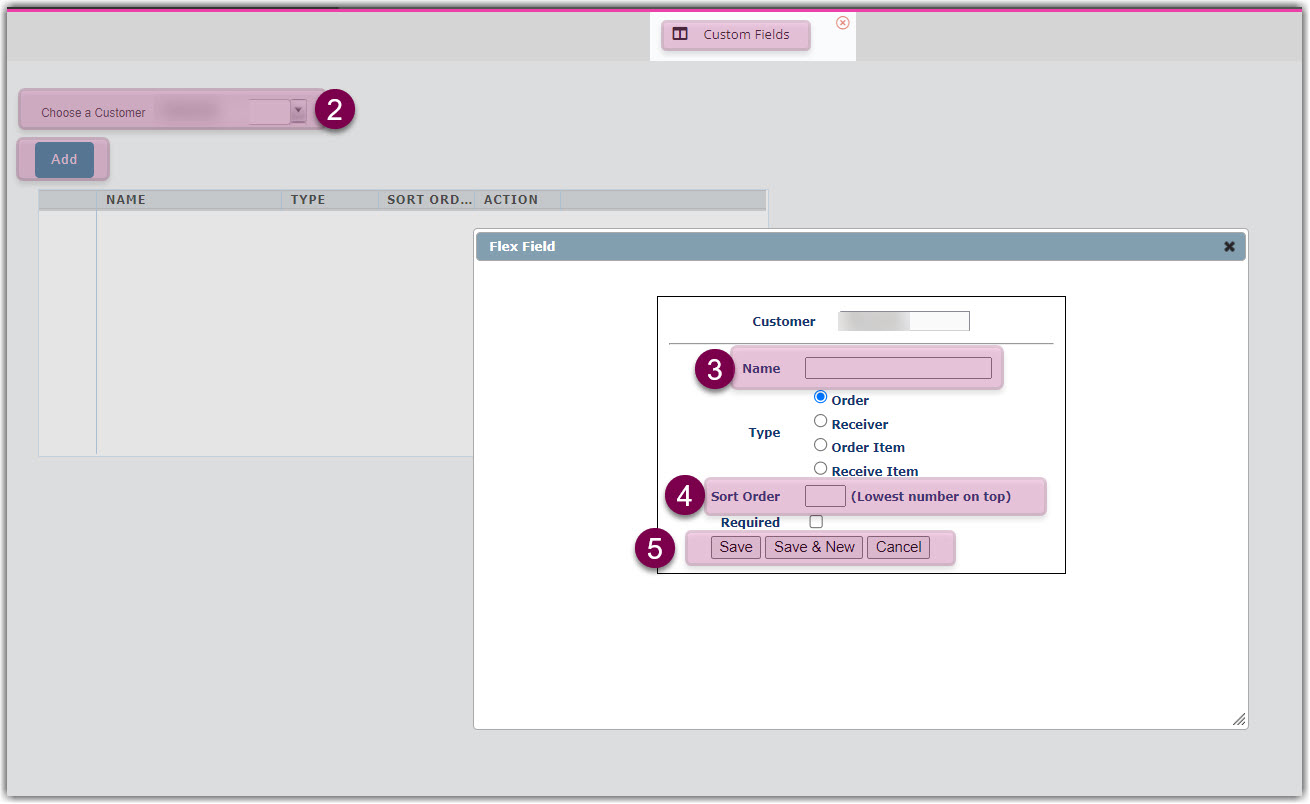
- Select a customer from the drop-down menu, then click Add.
- Enter the 'Name' of the field you want to add, then select the 'Type' of field—i.e., order or receipt; transactional or line item.
-
Optional: Enter the 'Sort Order' if you want to display custom fields in a specified order, then click the selection box next to Required if you want the custom field to be required to save an order.
- If you have just one custom field to enter, click Save. If you want to add additional custom fields, click Save & New and repeat these steps.

If you need to modify or delete a custom field, do so from the same Custom Fields page. To modify, click the Edit icon next to the appropriate custom field, make your changes, then click Save. To delete, click the trash icon, then click OK to confirm.
