FTP Inventory Import for a 3PL
Once your orders have been shipped out to the customers from your 3PL warehouses, you need to also import the inventory data from your 3PL back into Extensiv Network Manager. This is to ensure that your inventory data is always updated.
The following article provides detailed instructions for configuring your 3PL's FTP connection to support an inventory import.
You need to map the inventory data file into a format that can be accepted by Network Manager by setting up inventory import.
- On Extensiv Network Manager, click Order Routing. Confirm the selection of the company by clicking the dropdown next to Currently Viewing field.
- Navigate to Settings module.
- Next, click Warehouses.
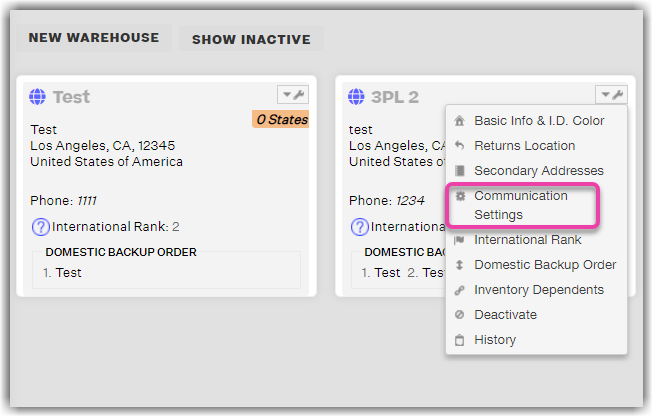
- Click the wrench icon to the right of the warehouse name, then click Communication Settings.

5. Click Inventory Import.
6. On the File Configuration section, select the format and structure of the file from the supplier, then enter the folder path. You may then download the file to preview it.
7. On the Daily Schedule section, add a run time for the automatic import of the inventory data out of your supplier's system and into a file. You may add as many run times as you want.
8. On the Import Fields section, map the data from your supplier into Network Manager's required file format. This ensures that the inventory import will be error-free.
Required Fields: Master SKU, and On Hand Stock.
For the fixed file structure configuration, if column headers are required, make sure to check the Include column headers box.
9. Click Save Changes.
