Understanding Replenishments
3.3 min read
|The Replenishments feature significantly changes allocation behavior in 3PL Warehouse Manager. Before enabling replenishment, carefully review these settings and permissions so they align with your warehouse workflows.
What triggers Replenishment
Replenishment automatically generates a Move Request when a Pick Line location’s Available Quantity falls below the defined minimum and a Pick Job has been completed with the “Pick Done” option selected. The Replenishments feature also introduces support for “non-pickable” locations in 3PL Warehouse Manager. Typically, when a pick line location has insufficient quantity, the system allocates what it can from the pick line, and the rest from a storage location that has the item.
Quantity‑driven allocation (Key Concept)
A key concept related to replenishment is “quantity-driven allocation”, which permits a 3PL to segregate the fulfillment of smaller, typically eCommerce, orders from larger, typically B2B or retail fulfillment orders. The replenishment architecture supports this by setting a quantity threshold for each item from which the WMS can decide if the order should be allocated from a pick line (smaller quantity) or from bulk storage (larger quantity). This also prevents the system from allocating orders from both a pick line location and a bulk storage location. To avoid this type of inefficient order picking, the Replenishments feature instructs the system to allocate only from the pick line location. Once replenished, overallocated orders will automatically be allocated from the pick line location.
How to access and enable Replenishment
Warehouse settings
- Click Warehouse > Manage Warehouse in the left navigation.
- Select a warehouse and click Edit.
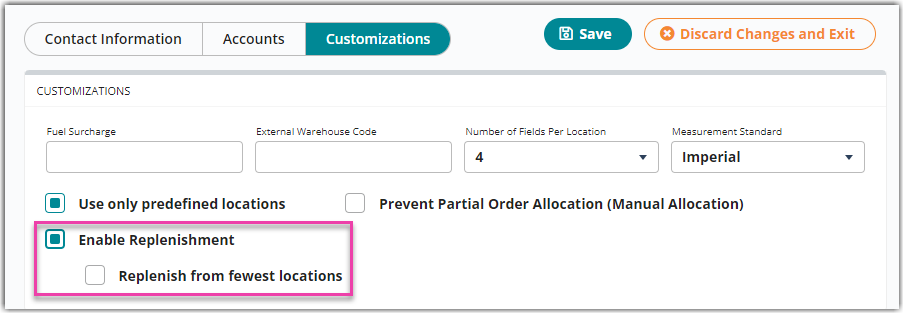
- Set the Replenishment-related settings in the Customizations tab as needed then click Save.
- Enable Replenishment enables replenishment logic for this warehouse. Inventory is be made available for replenishments based on Location and Item settings.
-
Replenish from fewest locations tells the system to use locations with higher quantities when creating a move request. This overrides item allocation settings such as (FIFO, LIFO, FEFO) when selecting inventory for a replenishment move request.
Item‑level Replenishment settings
You need to enable Replenishment for the items you want to replenish in the warehouse.
- Navigate to Items > Manage Items.
- Select the item you want to enable Replenishment for and click Edit.
- Click the Units of Measure tab and scroll down to the ‘Inventory Units of Measure’ section to select the Enable Replenishment setting.

Replenishment settings are grouped into a dedicated section.
Enable Replenishment -Required to generate replenishment move requests
Allocate from Pick Line - Determines when an order should allocate inventory from the pick line instead of bulk storage, based on an order quantity threshold. The default value for this setting is 10. Make sure to update this value as needed before enabling replenishment. We recommend setting this value to a multiple of the item’s “Primary units per package” when defined
Pick Line Minimum - When inventory falls below this value, replenishment is triggered
Pick Line Maximum - Target quantity after replenishment
Bulk Storage Minimum - Triggers replenishment when pickable storage quantity falls below this value
Bulk Storage Maximum - Target quantity after replenishment
Pick Line vs. Bulk Storage Replenishment logic
The WMS uses different logic for pick line replenishment and bulk storage replenishment.
Pick Line Location: Replenish in multiples of the item’s Packaging UOM (Primary Units per Package) to get as close to the Pick Line Maximum as possible without exceeding it.
Bulk Storage Location: Replenish in movable unit quantities. However, each move request is for a single movable unit, even if that unit is not full. This ensures that the replenishment process follows the item’s allocation method (FIFO, FEFO, LIFO), but it may mean that a single move request does not completely refill the location.
Replenishment settings - Location
Location Type |
Pickable |
Replenishable |
Pickline |
Yes |
Yes |
Storage |
Yes/No |
Yes/No |
Staging |
Yes/No |
No |
Quarantine |
No |
No |
Putaway Vehicle |
No |
No |
These settings will automatically change based on the selection that is made.
Each location must have only one SKU for Replenishments to work correctly.
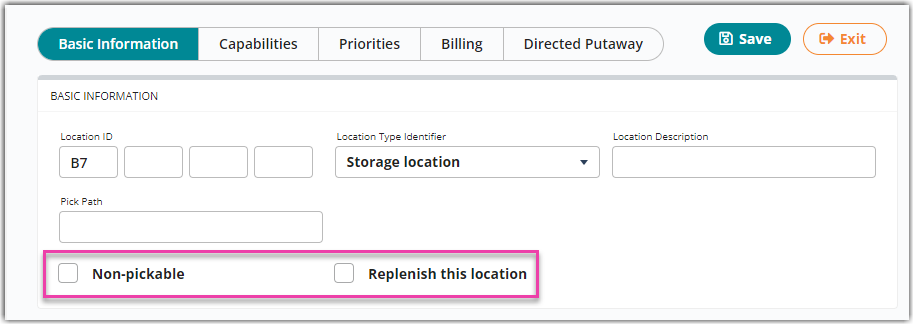
Click Warehouse > Manage Location > Select Location > Edit > Basic Information.
- Non-Pickable prevents orders from being allocated and picked from this location.
- Replenish this location enables replenishment logic for this location.
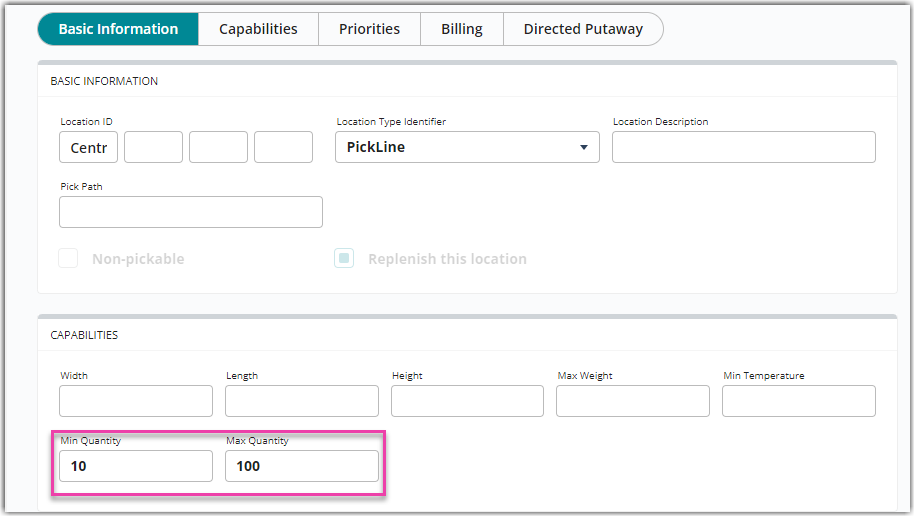
New fields for setting location minimum and maximum quantities. Set these values based on the item stored in that location.
- Min Quantity is the amount that triggers a replenishment.
- Max Quantity is the replenishment target. This only applies to pick-line and storage locations and is used only for replenishment. We recommend setting the maximum as a multiple of the item’s packaging quantity because Replenishment move requests won’t break open packaging.
If you change an item in a location, you need to change the min and max quantities accordingly.
Replenishment - SmartScan
Replenishing in SmartScan is like a single SKU pick job. The Replenishment move request directs you to one or more locations to pick a specific quantity from each location and validate track-bys. You then take the inventory to the specified location, verify the destination, and complete the move.
Move request priorities
- Overallocated orders exist = High Priority(1)
- Pick-line is fully allocated = Mid Priority(2)
- Pick-line has available inventory = Low Priority(3)
Overfilling
Users can now pick more than the requested quantity when replenishing, allowing the destination location to exceed its configured maximum.
This behavior provides flexibility for floor workers and helps reduce future replenishment trips. Access to this feature is permission-controlled.
Role‑Based Permissions
Two warehouse‑level permissions control replenishment actions in SmartScan:
Navigate to Users > Manage Roles > Mobile Scanner > Replenishment Module.
- Create Replenishment Jobs
- Allows users to manually create replenishment jobs
- The location does not need to be below its minimum
This role is currently visible, but its functionality is not yet available. This feature is coming soon.
- “Overfill” When Replenishing a Location
- Allows users to pick more than the requested quantity
- Enables overfilling the destination location
If these permissions are not enabled, related SmartScan features will not be available.