Creating Item Assemblies
When creating or editing an item, you use the Assembly section to define components that make up an assembly (also commonly referred to as a kitted item). Assemblies aren't available to items with qualifiers. This article reviews how to create assembly components for an item.
To access this configuration section, you must have the following permission assigned to your user role: Customer Module > Customer Items > Manage Assemblies.

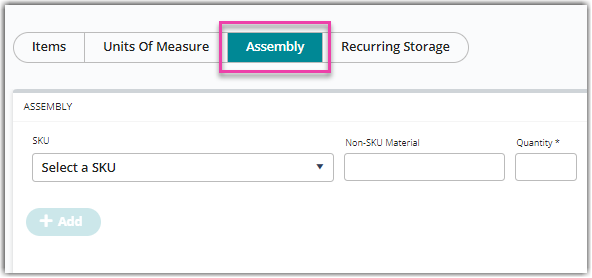
1.Select the Assembly configuration section.
2. Identify the first assembly component by selecting a 'SKU' from the drop-down menu or entering a 'Non-SKU Material' value.
3. Enter a 'Quantity', then click + Add to populate the component in the grid.

4. Repeat Steps 2 and 3 for each component in the assembly.
5. If you need to modify an existing component, select it from the grid, click Delete, then re-add accordingly.
6. Optional: Add 'Material Notes' as needed.
7. Click Save.
Once you define each component that make up the assembly, you can perform the assembly process under Items > Manage Assemblies. For guidance, please see Managing Assembly Transactions.
You can also continue to the next configuration section—Configuring Item-Level Recurring Storage Charges. If you'd like to come back and edit the item at a later time, don't forget to click Save.

