3PL Warehouse Manager

Updated on July 17th, 2023

  • Extensiv Hub
    Popular Articles Getting Started Using Hub Technical Issues & FAQs Extensiv's Ideas Portal
  • 3PL Warehouse Manager
    Receiving Operations Inventory Management Shipping Operations System Configuration Scanning Operations Integrations Content Best Practice Resources Release Notes Popular Articles Troubleshooting Guides
  • Warehouse Management
    Getting Started Admin Console Shipping Order Picking & Packing Receiving Customer Portal Cycle Counting Kit Building Managing Users Barcode Scanner Import/Export Integrations Barcoding Wave Picking Bin Move Mobile Receiving and Picking Settings Popular Articles Reporting
  • Order Management
    Dashboard Orders Inventory Purchase Orders Shipments Customers Products Analytics Settings API API Integrations Accessing and Navigating Order Manager Error Messages Order Manager Popular Articles Accounting Integrations
  • Integration Management
    Getting Started with Integration Manager General Support Troubleshooting Extras & Addons API Documentation Popular Articles Order Sources Order Destinations
  • FAQs
  • Network Manager
    Getting Started Order Routing Management Technical Issues Shopping Carts Settings Settings, Products, and Orders
  • Billing Manager
    Getting Started Using Billing Manager
  • Release Notes
    Extensiv Sandbox Extensiv Extensiv Hub 3PL Warehouse Manager Integration Management Warehouse Management Order Management Billing Manager
  • Fulfillment Marketplace
    Getting Started
  • Sandbox
    Getting Started
+ More
  • Help Center
  • 3PL Warehouse Manager
  • Scanning Operations
  • Inbound Operations
  • Scanning Operations
    • Configuration
        • Setting Up Barcodes
        • Getting Started with GS1 Barcodes
        • Connecting Printers to SmartScan
        • Managing Barcode Definitions
        • Updating Samsung Keyboards
        • Configuring SmartScan on Zebra Enterprise Browser
        • Clearing Enterprise Browser Cache in SmartScan
        • Creating Custom MU Labels
        • Configuring SmartScan on Keyence Devices
        • Capturing Images in SmartScan
    • Inbound Operations
        • Receiving with SmartScan
        • Creating Receipts with SmartScan
        • Receiving Against an ASN
        • Printing MU Labels for Receipts
    • Inventory Management
        • Performing Inventory Audits
        • Moving Inventory with SmartScan
        • Looking Up Inventory with SmartScan
    • Outbound Operations
        • Picking Orders with SmartScan
        • Creating Pick Jobs
        • Multi-User Picking in SmartScan
        • Picking Multiple Orders
        • Bin-Picking
        • Picking for Load-Out
        • Picking for Load-Out FAQs
        • Packing Orders with SmartScan
        • Packing from Shelves
        • Using Outbound Serialization
        • Enabling Pick Paths
        • Picking a Single Order

Creating Receipts with SmartScan

If you have items arrive to your facility that are not associated with an existing receipt, you can create a receipt straight from SmartScan's Receipts module. This article reviews how to create a receipt with SmartScan.

To access the Receipts module in SmartScan, you must have the following permission assigned to your user role: Mobile Scanner > Mobile Receipts.

 
  1. Log in to SmartScan, and ensure the appropriate warehouse is selected.
  2. Tap the Receipts module, then select Manage Receipts. Note that the number displayed reflects the total number of Open and Complete receipts and returns for customers who are not using Receive Against ASN (RAASN) within the selected warehouse.


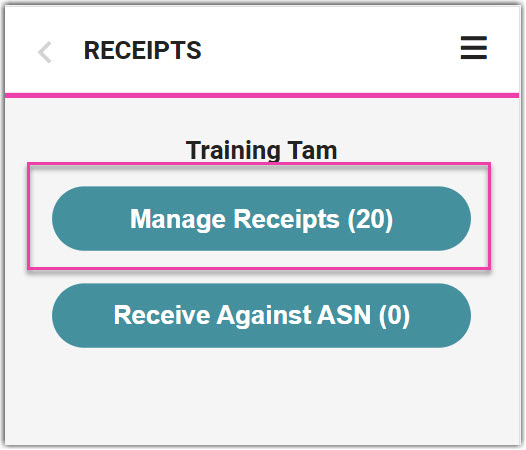
  3. Enter the name of a relevant 'Customer', then tap Create.
  4. Fill out each relevant field, then tap Save.


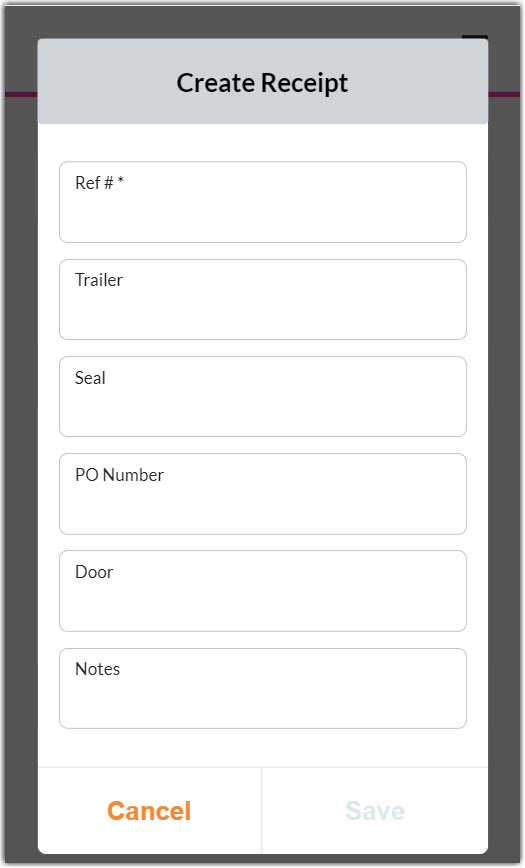
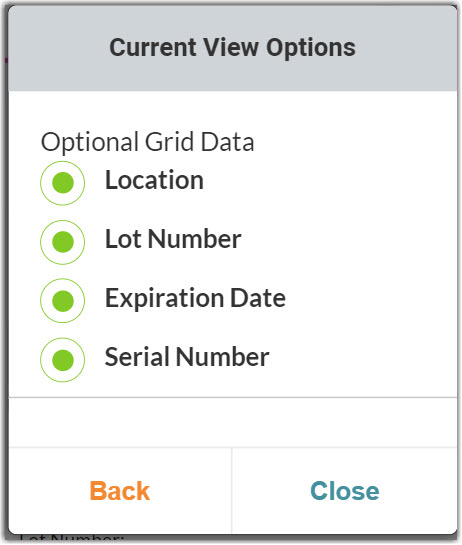
  5. Optional: To display lot numbers, expiration dates, or serial numbers in the line item grid, tap the hamburger menu in the top-right corner of the application, select Settings > Current View, select each data point you want to add to the grid, then tap Close.


  6. Tap +, then scan or enter the barcode of the first SKU.
  7. Next, enter the 'Quantity' received, then edit the 'UOM' as needed.
  8. Scan or enter the associated track-by values, then specify the movable unit (MU) details.
    • If the item is placed on a movable unit (MU) that has a unique license plate assigned, scan or enter the MU label now.
    • If you need the system to assign a license plate, tap the 'Movable Unit' field, then select System-Assigned.
    • If the item is not placed on a movable unit, leave this field empty or select No Movable Unit.
  9. Scan or enter a location, then tap Next to receive a confirmation message.


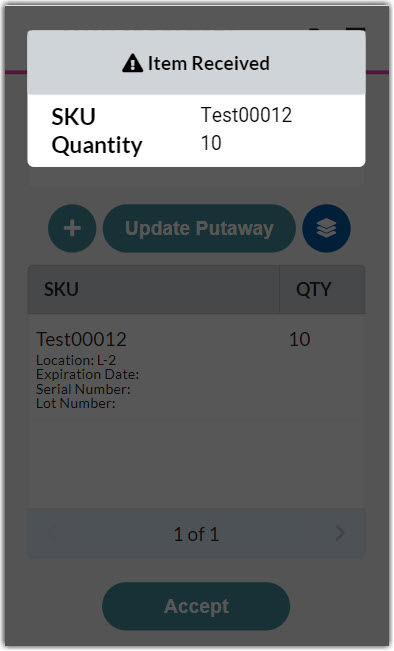
  10. The new line item displays in the grid. Repeat Steps 6–9 for each item being received.

    To edit or delete a line item, select it from the grid, then tap Edit or Delete.


    For other options like Displaying Weight field for receipts, ask your organization's administrator to turn on any SmartScan permissions related to your needs.

     
  11. If using directed putaway, tap Update Putaway, then confirm if you want to override the current putaway location(s).
    • No Override: Preserves existing locations and assigns locations based on directed putaway rules to line items without a location
    • Override All: Assigns locations to all line items based on directed putaway rules
  12. Once you have received and stored all items, it's time to view the associated charges and confirm the receipt by tapping Accept.

    To view the total charge amount, you must have the following permission assigned to your user role: Receipts Module > Receipt Charges > Manage Charges. The customer must also have predefined manual charges configured for the Charges page to display.

     
  13. To specify or modify the number of units on a billing charge, tap the appropriate grid row, enter the '# of Units' associated with the charge, then tap Save to populate the value in the 'NumUnits' grid column. Repeat for each charge as needed.


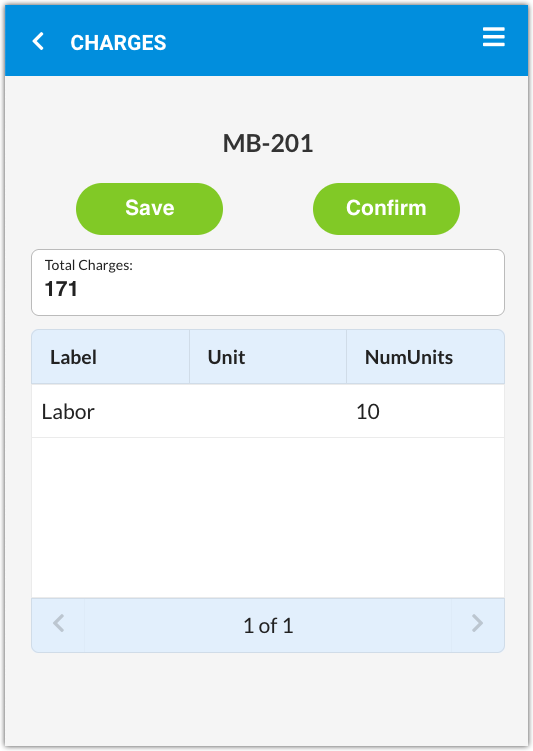
  14. Ensure the charges are correct, then tap Confirm. The receipt is then removed from SmartScan and the associated inventory is available for order allocation.

If the received items arrived unexpectedly, we recommend generating a View Transaction Report to provide to your customer.

 
receipts smartscan

Was this article helpful?

Yes
No
Share additional feedback about this article

Related Articles

  • Batch Order Processing
  • Adjusting Order Charges
  • Picking Orders with SmartScan
  • Managing Ship-to Contacts

Not finding the help you need?

Contact Support
Solutions
  • Solutions for Brands
  • Solutions for 3PLs
  • Solutions for 4PLs
  • Solutions for B2B
Products
  • Extensiv 3PL Warehouse Manager
  • Extensiv Warehouse Manager
  • Extensiv Order Manager
  • Extensiv Integration Manager
  • Extensiv Network Manager
Products
  • Customer Success
  • Implementation
  • Consulting
Ecosystem
  • Fulfillment Marketplace
  • Integrations
  • Partners
  • Become a Partner
Resources
  • Resource Library
  • Blog
  • Market Insights
  • What is a 3PL?
  • What is a 4PL?
  • What is a WMS?
  • Why a Cloud-based WMS?
  • Glossary
Help
  • Help Center
  • API Documentation
  • Extensiv Univerisity
  • Community
  • System Status
  • Extensiv Logo
  • 100 N Pacific Coast Hwy, Suite 1100, El Segundo, CA 90245
  • |
  • Contact Us:
  • 83-EXTENSIV 888.375.2368 (main)
  • |
  • 310.844.7570 (local)
  • Copyright © 2023 Extensiv
  • |
  • All rights reserved.
  • Privacy Policy
  • |
  • Terms of Service
  • Follow Us:
Expand