Setting up Purchase Order (PO) Templates
Overview
This article provides a step by step guide on setting up PO templates in Order Manager.
How-to Guide
The purchase order template generated when sending and authorizing a P.O. can be customized. Once completed, vendors can share a common template or users can create specific P.O. templates per vendor.
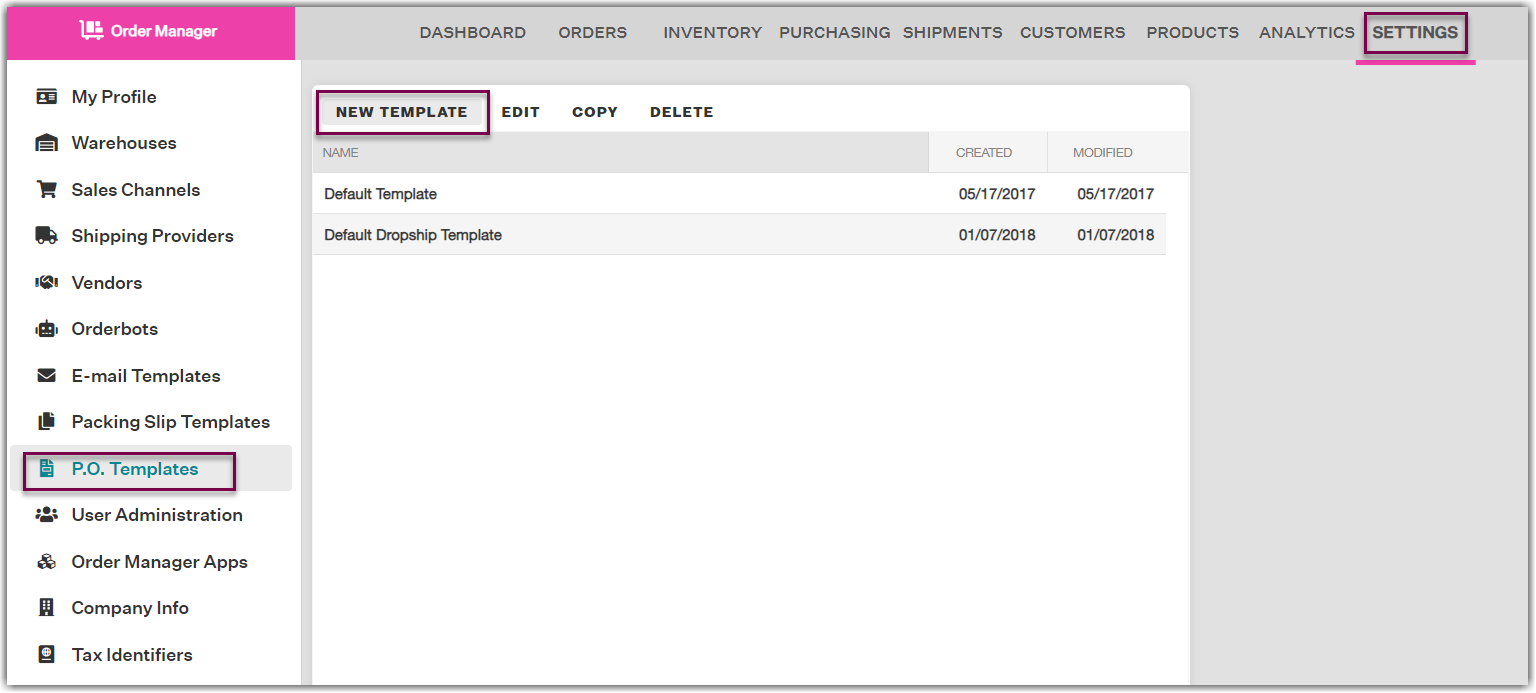
- To begin, go to the Settings module and click on the P.O Templates tab from the left-side menu. Every account comes pre-loaded with a default template that cannot be edited or deleted. These defaults are basic guides that can help you start creating a custom template, or can be used as they are.
- To begin customizing a basic PO Template, click on + New Template.
 Otherwise, you can highlight the Default Dropship Template row and click Copy to customize a PO template specifically for dropship vendors.
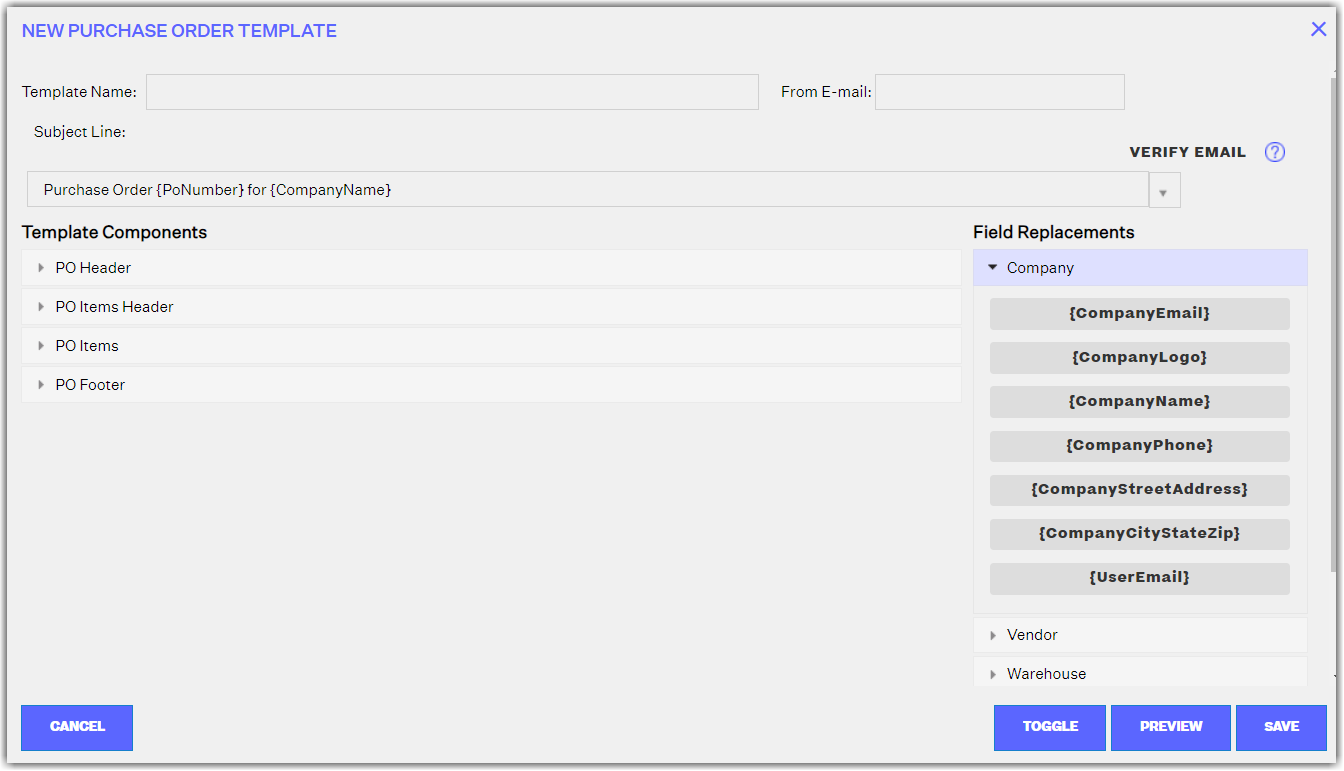
 - In the topmost row of the new window, you can give your new template a unique name. Users can also change the FROM email address so that the PO appears to be coming from a specific e-mail address instead of the default email by specifying the desired address in the text field in the top right.

- PO templates are split up into 4 main components:
- PO Header
- PO Items Header
- PO Items
-
PO Footer
You can choose to edit existing static and dynamic text. To insert dynamic fields into the template, first click on where you want to place them in the template on the left side, then click on the desired Field Replacements on the right.
The field replacements options here are split into six sections:- Company
- Vendor
- Warehouse
- Purchase Order
- PO Items
-
Barcode Imag
All of the field replacements are optional. Users can customize their own set-up within each section by using field replacement options and/or static text. Relevant information will be shown on a PO form at the time of its generation.
- For more advanced users, the templates support editing via HTML by clicking the <> Toggle button at the bottom of the window. Field replacements will insert using the {bracket} syntax into this view as well.
- These templates can be previewed by clicking on the Preview button in the bottom-right menu bar. Below is an example of a PO Template Preview where the Company Logo is populated.
Please note: not all dynamic field replacements will populate text or images in the preview generated as it would need to be connected to an actual purchase order for the preview to pull all relevant fields that exist in the PO. - Click Save after making all desired edits. Saved templates can be modified later by selecting then clicking Edit in the P.O Templates tab. At this point, you can set your new PO template as the default template for a Vendor in the PO Defaults section of Vendor information, use it in orderbots, and/or set it as the template for a specific PO in the POs module.
There is no limit to the number of templates you can create within an account.
