Importing Orders Via Spreadsheet (In Bulk)
After adding a manual sales channel and linking your listing SKUs to a master SKU, you can start importing your orders into the channel.
To import orders manually, follow the procedure below.
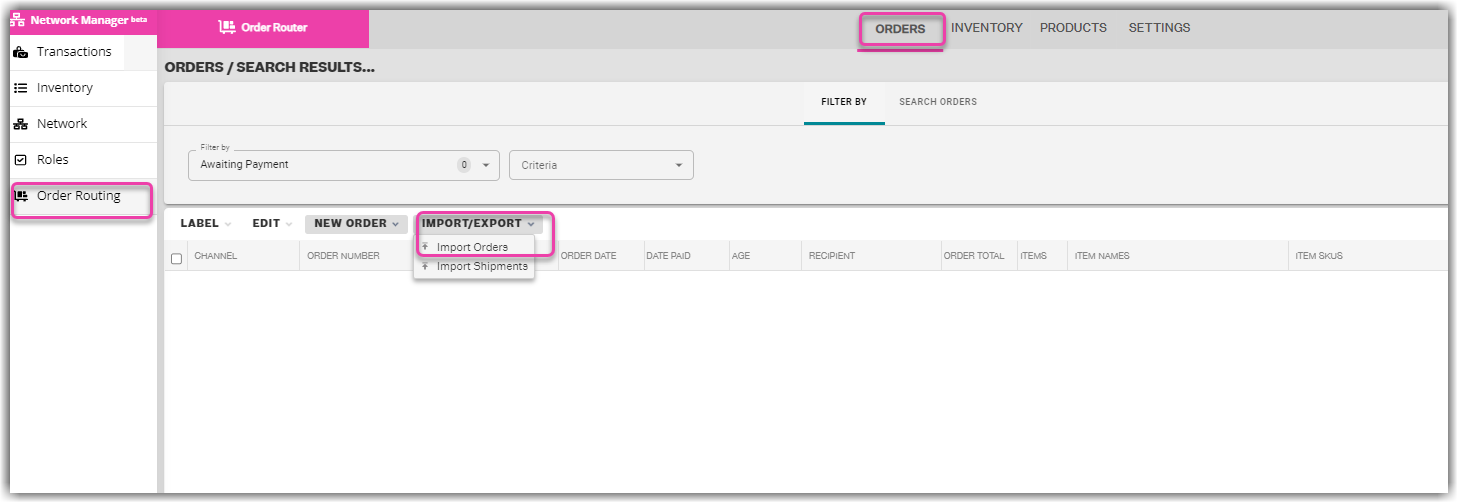
Step 1: Navigate to Order Routing page. Next, open the Orders Module.
Step 2: Click the Import/Export drop-down menu.
Step 3: Select Import Orders. 
Step 4: In the Manual Order Import window, click Configure. 
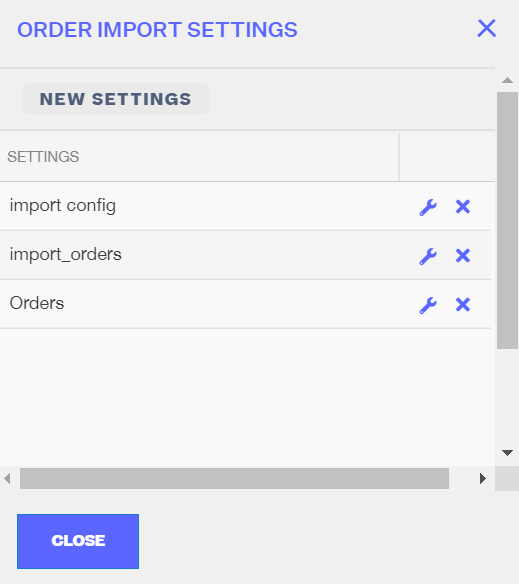
Step 5: In the Order Import Settings window, click New Settings.
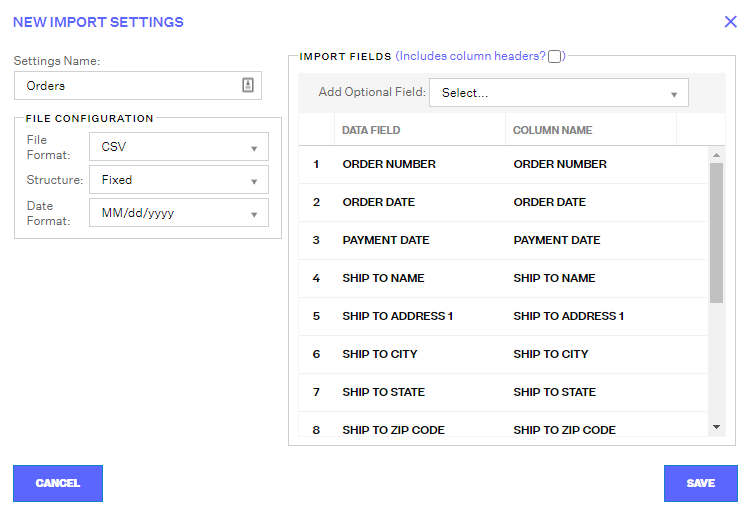
Step 6: In the New Import Settings window, give your settings a title in the Settings Name field. A descriptive name would be best, e.g. Import_All_Fields, or September 2020 Settings.
Step 7: Select the file format from the CSV and Text options, and select the structure, and the date format.
Step 8: Add and/or organize the Data Fields you'd like to use. Ensure that every Data Field has a corresponding Column Name that you'll be able to recognize in your Import File. To reorder Data Fields, drag and drop them.
All data fields in Import Fields are required both in the Configuration and in the actual import file. You may add an optional field through the Add Optional Field dropdown. The following prepopulated and required fields:
- Order Number
- Order Date
- Payment Date
- Ship to Name
- Ship to Address 1
- Ship to City
- Ship to State
- Ship to Zip Code
- Ship to Country
- Item SKU
- Order Item Quantity
- Order Item Unit Price
- Customer Ship Amount
- Amount Paid
If you want to make column headers required, make sure to check the Include column headers box.
Step 9: Once you're satisfied with your configurations, click Save to close the Import Settings window.
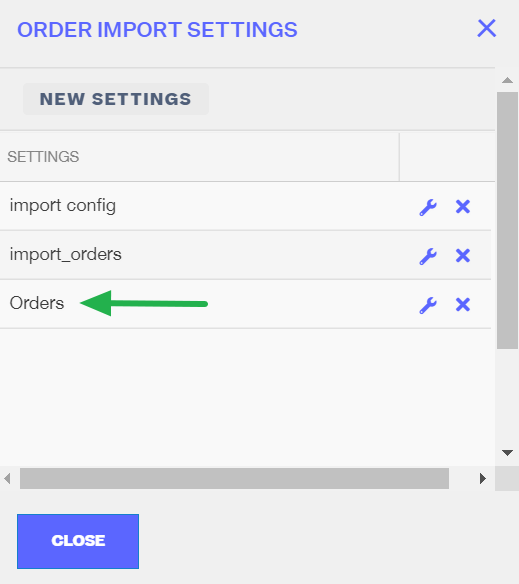
Step 10: Back in the Order Import Settings window, the new settings are now added to your Settings list. Click Close to close the Order Import Settings window and go back to the Manual Order Import window.
Step 11: Create either a CSV or Text file according to the file format you chose in your configuration settings, and input your orders to import in the exact column format that matches your configuration settings as well.
The row headers and configuration settings are case-sensitive.
Any deviation to the file format will cause import issues, including if you do/don't include the row headers. These issues could be caused by having more columns than your configuration settings to have Data Fields, or putting a Date input in a column that was configured for an amount of money (like Amount Paid). Make sure to double-check that any date text is in the exact format matching your configurations and that all required fields are filled in. Make sure your file is saved in the right file format.
Importing Orders through a spreadsheet is in a multi-line format.
Example: if 1 order has 2 items, there should be 2 lines on the spreadsheet to notate that both line items belong to the same order number.
Step 12: Back in the Manual Order Import window, click the Import Settings dropdown menu and select the settings you just created. Set the Manual Sales Channel to the correct channel. Then click the Select button and choose the CSV or Text file from your computer to import. Click Continue to start uploading the file into Extensiv Network Manager.
Extensiv Network Manager will then start processing the import file. The speed with which the process runs and completes depend on the number of manual orders to be imported into Extensiv Network Manager. If an Error Log is generated, ensure that the rows with issues detected are addressed. If there is a general error that the file could not be uploaded, there is likely an issue with the number and order of columns in your file not matching the Configuration Settings exactly, or the presence or lack thereof of Headers, or the file format itself is incorrect. Double-check your settings and file until an Error Log is produced and notifies you that your import was completely successful.


