
Using High Volume Processing (HVP) with SmartParcel
4.2 min read
|This article explains how to use high-volume processing (HVP) in SmartParcel to ship orders in batches instead of picking and packing them individually. HVP lets you queue up to 1,000 shipping labels per batch while the system processes the orders and populates shipping data in the background.
Prerequisites
- Your orders must be fully packed with accurate package data.
- High-volume processing must be enabled for your account under Admin > Settings.
- Batching orders ahead of time isn't required, but it's best practice for high-volume shipping. If you use batch order processing in your shipping workflow, use those same batches with HVP. Otherwise, you can batch within the HVP tool itself.
Step 1: Enable default HVP processing (optional)
If you process high-volume shipments for a customer on a frequent basis, you can enable HVP by default so you don't have to select it manually each time.
- Go to the Small Parcel space and select Settings.
- Choose a customer from the drop-down menu.
- Under General, select the checkbox next to Process High Volume by Default.
- Click Save. Repeat for each customer as needed.
When you turn on this setting, high volume printing (HVP) is enabled by default. The system generates labels and updates orders asynchronously. Ship your orders as usual, then print your labels from Manage > Print HVP Batches.
If you prefer to print labels immediately, uncheck Process High Volume by Default.
Step 2: Process labels
To begin processing labels for a high-volume shipment, open SmartParcel by selecting a batch of orders from the Small Parcel grid and clicking Pack and Ship.

If you are utilizing the official batching feature, use the 'Batch Name' search filter within the Order Details filter container. You can then click Select All above the grid to ensure no orders are left behind when you use the HVP tool.
While this functionality can support up to 1000 package labels at once, factors such as system loads and internet quality can affect performance and printing the maximum number of labels could potentially result in timeouts.
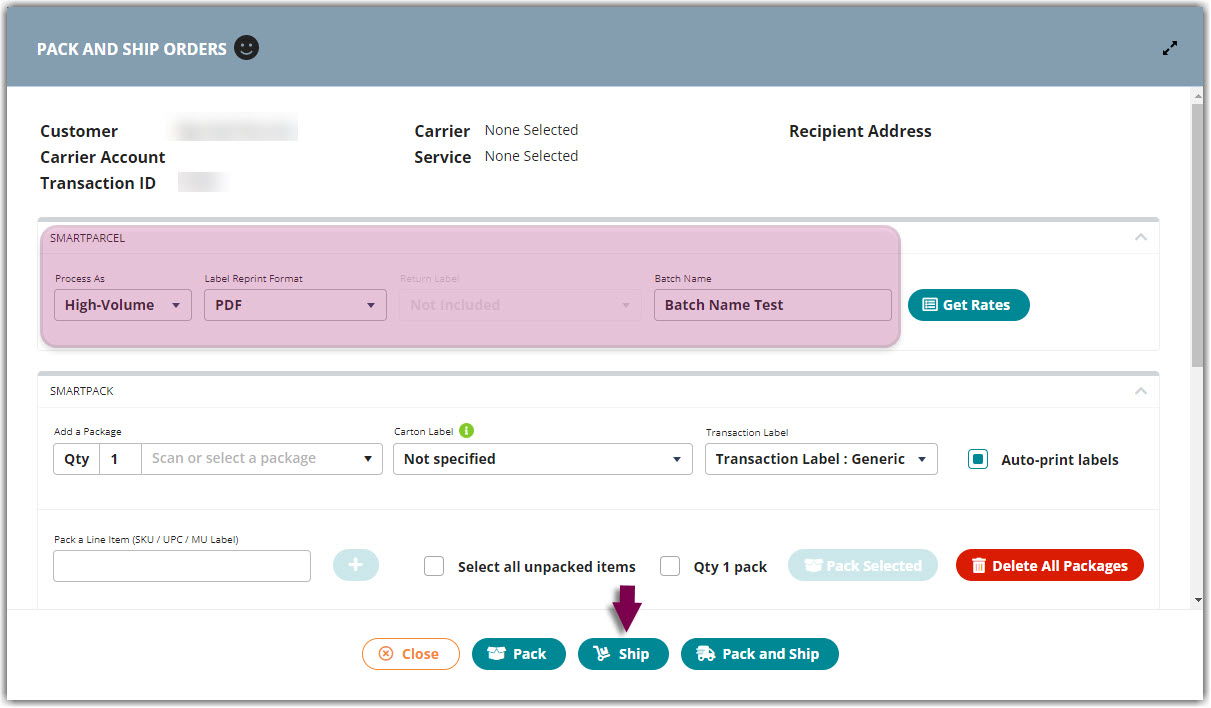
In the Pack and Ship dialog, select your label preferences:
- Process As: If you chose not to process high-volume by default in the previous step, select High-Volume.
-
Label Format: Select the format you'd like to use to print and reprint your shipping labels
If printing combo labels for HVP shipments, you must select PNG (Combo Label) as the label format and then select your label template via Manage > Reprint Labels after you've processed your labels via HVP. Please note that this is not supported with multi-package orders. - Batch Name: Enter a name to easily identify the batch of labels in the next step
Next, click Ship to queue your batch of HVP labels.
Step 3: Print labels
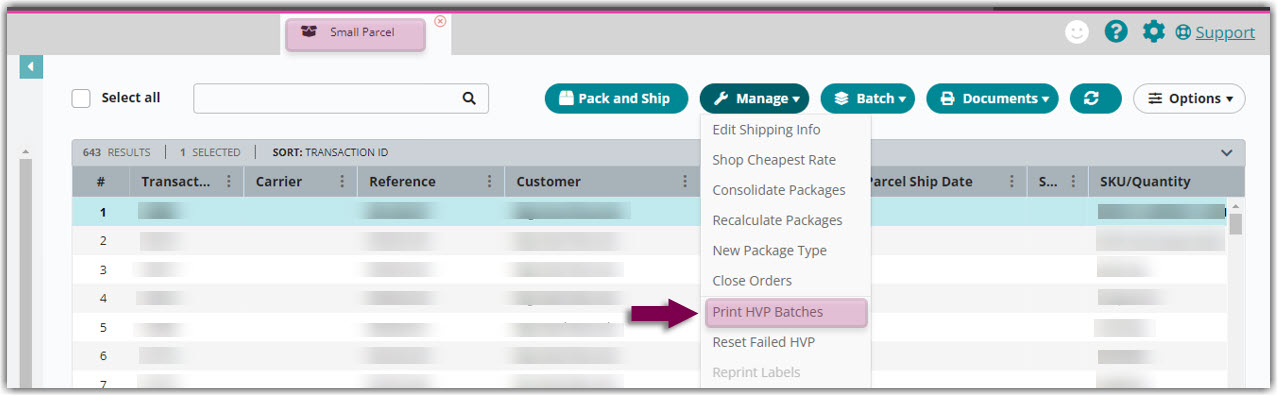
Once the labels begin processing, you can view the processing status and print the associated shipping labels in the Print HVP Batches dialog.
- On the Small Parcel homepage, select Manage > Print HVP Batches. The High-Volume Batches grid displays all processed or currently processing batches of labels.
- If you want to refine the grid results, all standard grid manipulation options apply:
- Modify the search filters using the fields in the top Filter Results container.
- Modify the grid columns via Options > Columns. Available columns include the following:
- ShipEngine ID: Identifier value that is used for ShipEngine communications
- Batch Name: Value specified on the SmartParcel page
- Customer/Warehouse: Customer and warehouse relevant to orders
- Date: Date and time stamp of when a batch began processing
- Totals: Displays the following—Total number of orders in the batch (Number of orders processed / Number of orders that contain errors)
- Status: Identifies whether a batch is still 'Processing' or 'Complete'—there is also a status in between Processing and Complete called 'Notifying', which indicates that the order has been processed and that ShipEngine is sending out notification that the batch was processed through the webhook
- Sort columns to your preference by dragging/dropping them, or sort the grid data by selecting a column header (use < Ctrl > on your keyboard to sort by two headers at once).
- Set a filter on a grid column using the ellipsis next to the column header.
- All selected filters and column modifications populate the next time you access this screen.
- Once you've modified the grid as needed, reference the Status grid column to view the batch's processing status.
- If the status is not Complete, wait a few seconds to click the Refresh button above the grid. Repeat until you see that the status is Complete.
- Once processing is complete, the shipping data begins to update on the orders (Parcel Label Type, Small Parcel Ship Date, Tracking Number) and you can print the associated shipping labels.
- International orders only: To print shipping documentation for international orders, such as a commercial invoice included with a package's shipping label, click Print Documents instead of Print Labels in the next step.
- Select the appropriate label format (PDF or ZPL) above the grid, select the batch from the grid, then click Print Labels.
- If successful, a confirmation message appears; a single file generates that includes all shipping labels; and the Parcel Label Type, Small Parcel Ship Date, and Tracking Number data populate in the respective columns in the Small Parcel and Find Orders grids.
- If a shipping label fails to print for a package, a red alert icon displays in the Status column. Select the alert icon to view the associated transaction number and error message. Once you resolve the error(s), you can reprocess the package(s) and reprint the associated shipping label(s) using standard processing or by clicking Manage > Reset Failed HVP and repeating Steps 1–5 above.
In certain instances, shipping data (i.e., Parcel Label Type, Small Parcel Ship Date, and Tracking Number) may not populate on an order after you've attempted to print shipping labels. If this happens and you receive no errors or alerts in the Status column, click Update to trigger a forced update.
If shipping data is still missing from the orders, select the relevant orders from the Small Parcel grid, then click Manage > Reset Failed HVP. This action resets the failed orders so you can reprocess the labels through SmartParcel—either individually or through a new batch—to allow the shipping data to properly populate after generating the shipping labels for those orders.
Managing Batches in the High-Volume Tab
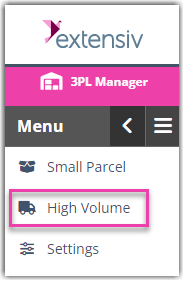
Click the High Volume option on the left navbar to access High Volume Processing 2.0.
Creating a new batch
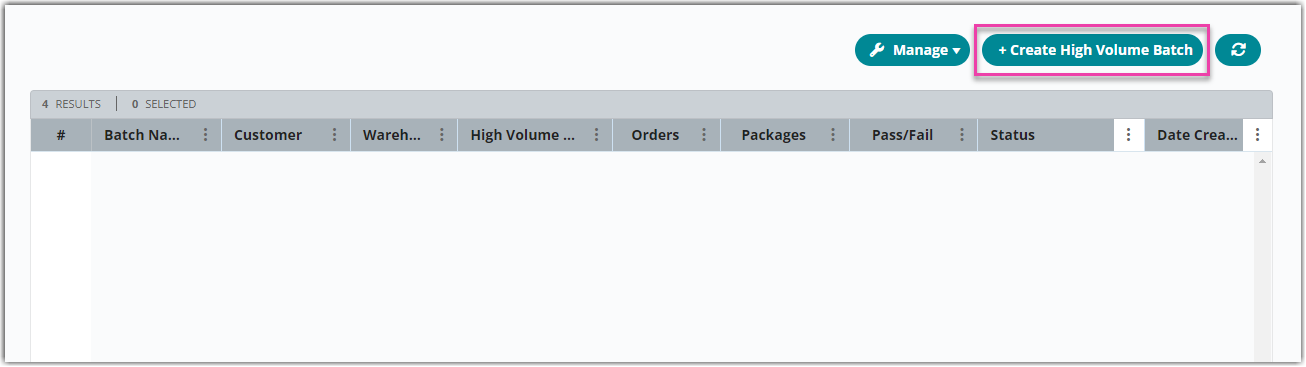
- To start creating a new batch, click Create High Volume Batch.
The workflow for batch creation is the same as High Volume Processing 1, orders must be in a complete status to be processed in Small Parcel Suite.
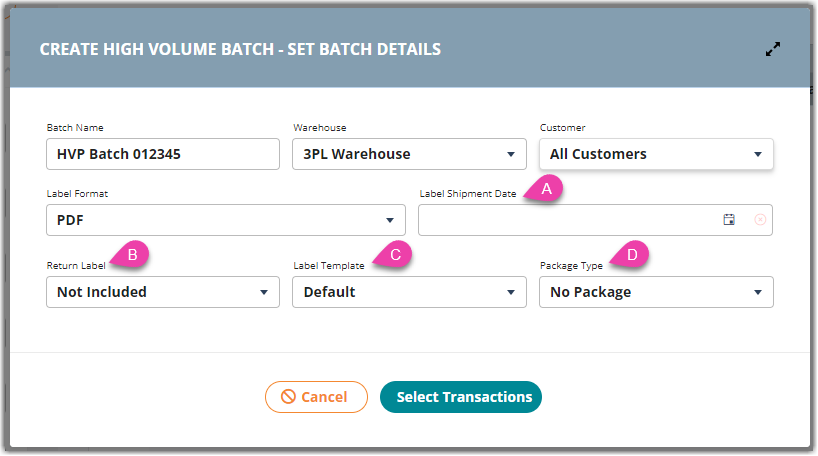
- Configure the appropriate fields in the Create High Volume Batch – Set Batch Details window.
- Label Shipment Date: Allows you to set the shipment date and the system will default to the current date if you do not set this value.
- Return Label: Allows for return labels to be created with your outbound labels.
- Label Template: Allows for the creation and inclusion of packing slips.
-
Package Type: Allows for auto-packing functions such as Recalculate and Consolidate packages to run during the batch process.
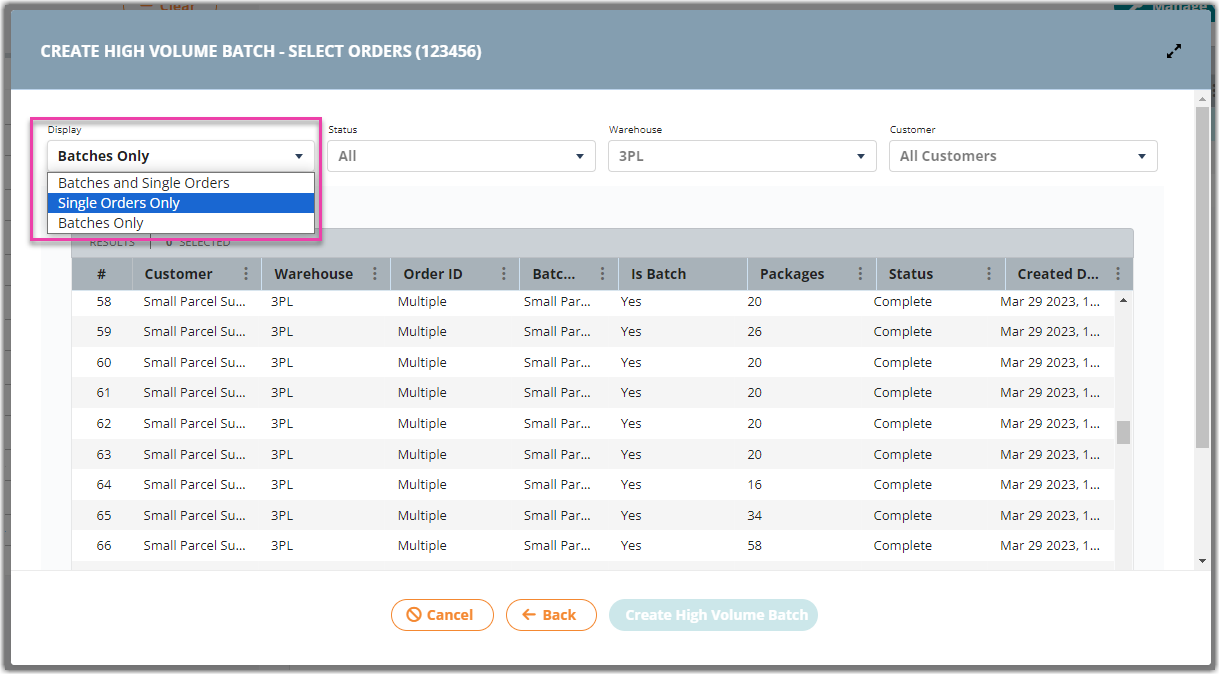
- After setting your batch options, you can filter the Select Orders grid by single orders or batches.
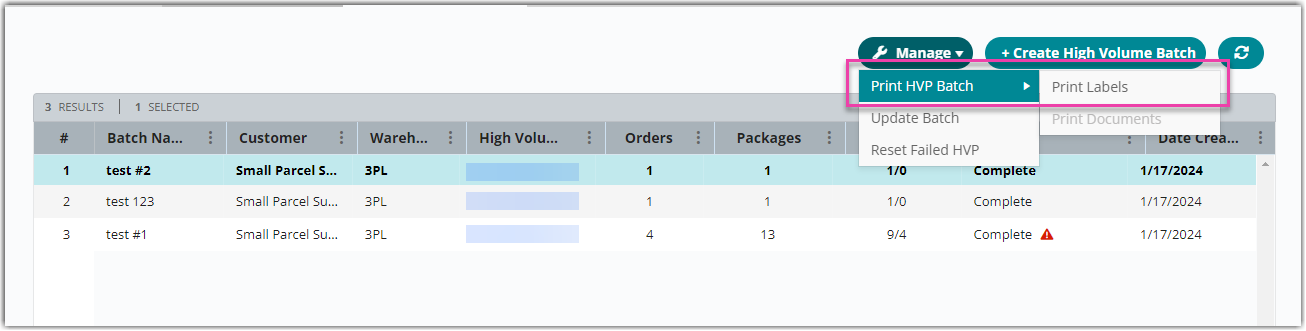
- Once you have created your batches, navigate to Manage > Print HVP Batch > Print Labels to print your labels.
Was this article helpful?
Share additional feedback about this article